Create a customizable, intelligent storage system for your media files and data. Your media than can easily integrate into a visible Landing page.
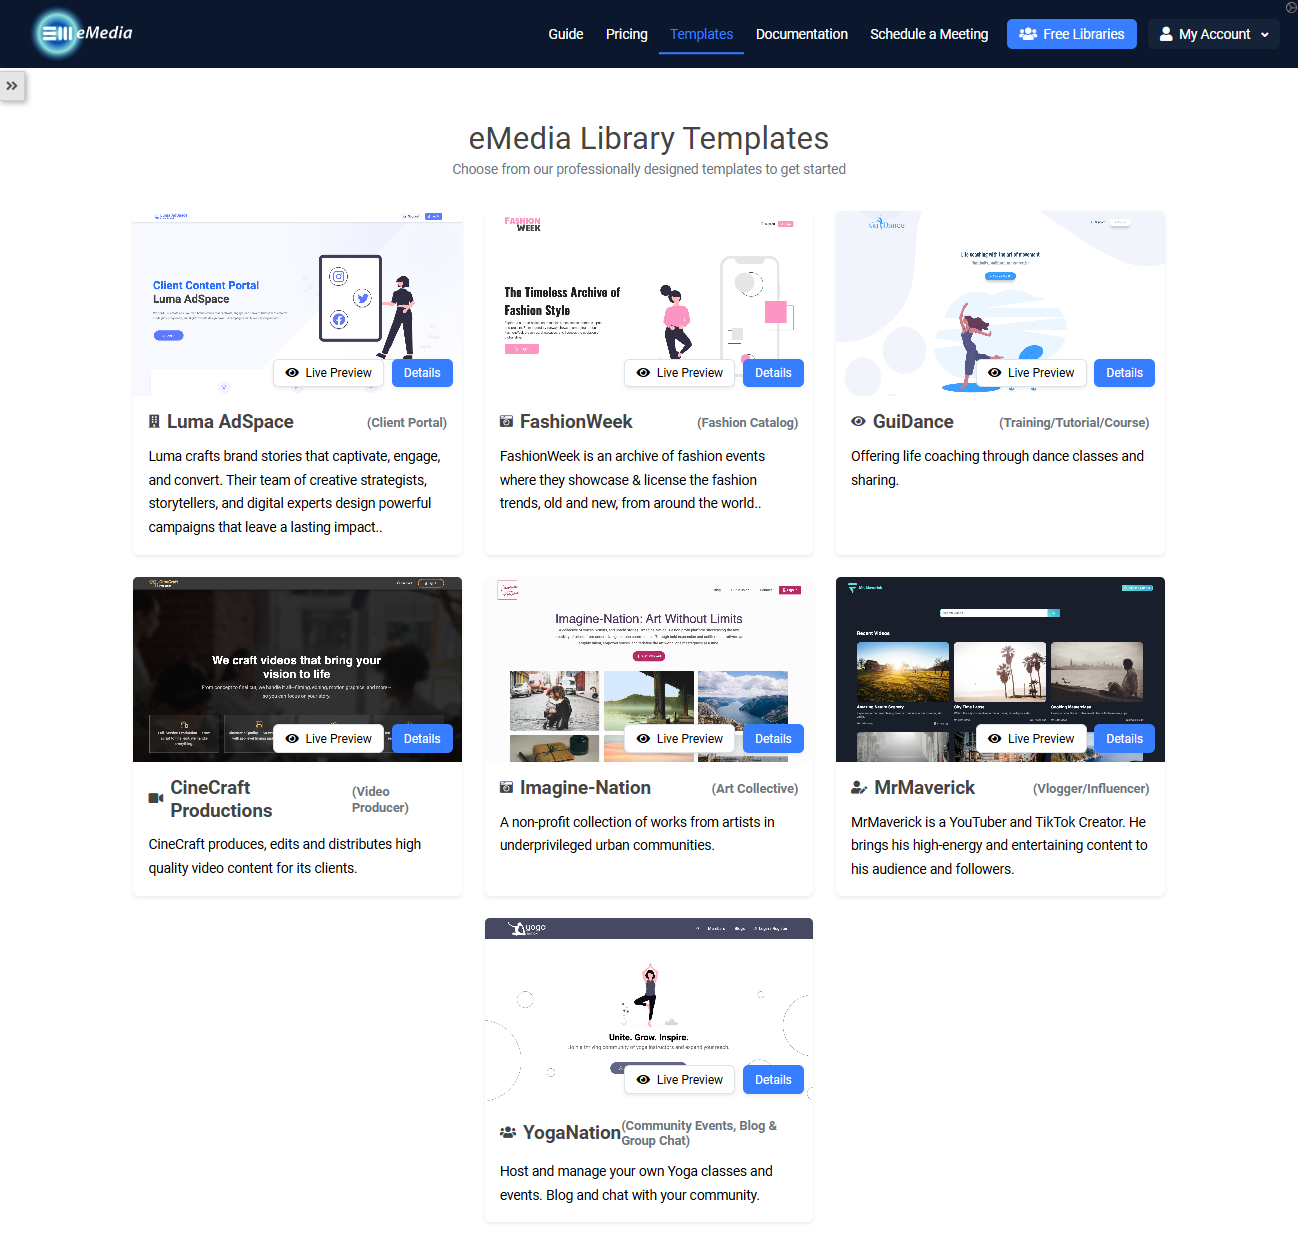
To begin, pick from our pregenerated template for your specific libraries needs.
You can create a custom template by contacting us
here.
We offer a wide array of features and offer templates to give general use cases and basic structure.
All templates can be customized to your preferences and have the ability to enable/disable any features.
(We also provide assistance in the creation of your library in the paid service)
From the list of templates, you can click on any of interest for more information, such as the specific features enabled for that specific template.
You can also live-preview the template in action, offering you a feel for how your library can look and run.
2. Customize your data
eMedia Libraries core organizational component is our "Smart Folders."
Our Smart Folders interface visually organizes by having parent files on the left, and connect to child folders on the right.
First, lets create a folder!
2.1. Create Smart folders
To create a new folder, click on Smart Folder on the left side of the screen.
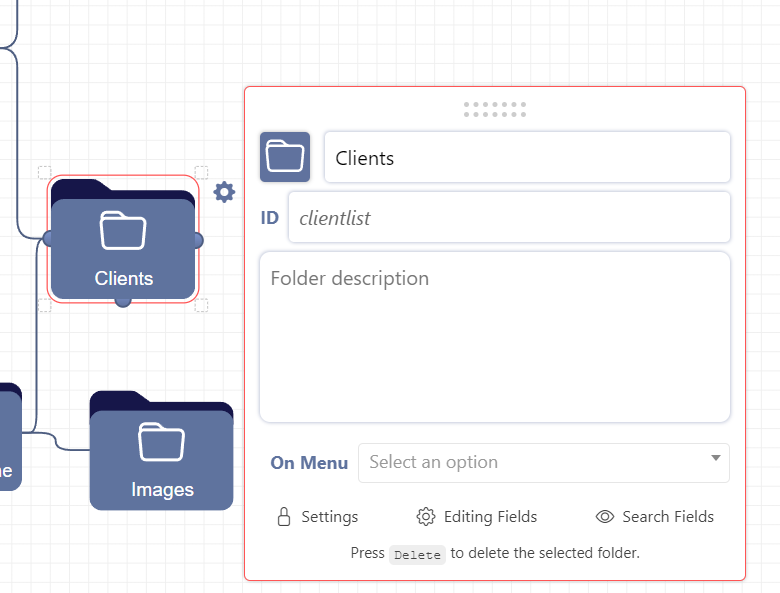
Double click on the folder to bring up its data content menu.
The first input box is the name of the folder. This can be changed at any time with no impact.
The second input box is for the
ID of the folder. This acts as the reference point other folders connect to. Best not to change this after naming it. Give the ID name some detail for easy reference. In the example below, the name of the folder is "Clients" and the
IDof the folder is "clientlist." This subtle detail specifies that it is a list of clients.
The big input box allows you to describe what this folder is specifically intended for. When collaborating with others, its useful to have detail to its content organization so others do not overload the file with unneeded content.
The next section is labeled"
On Menu" and has a drop down selector. From here you can select the folders placement on the top menu section within your app, if any. (There is an option to keep the folder hidden labeled "Not Shown")
The order of 1st - 5th is from left to right. So selecting the 1st placement option will place the folder you are editing onto the 1st left position on the menu bar.
Below the"On Menu" drop box are selections to edit the Settings, Fields and Search parameters for the search. Clicking on these will bring you to another page.
2.2. Add Relationships
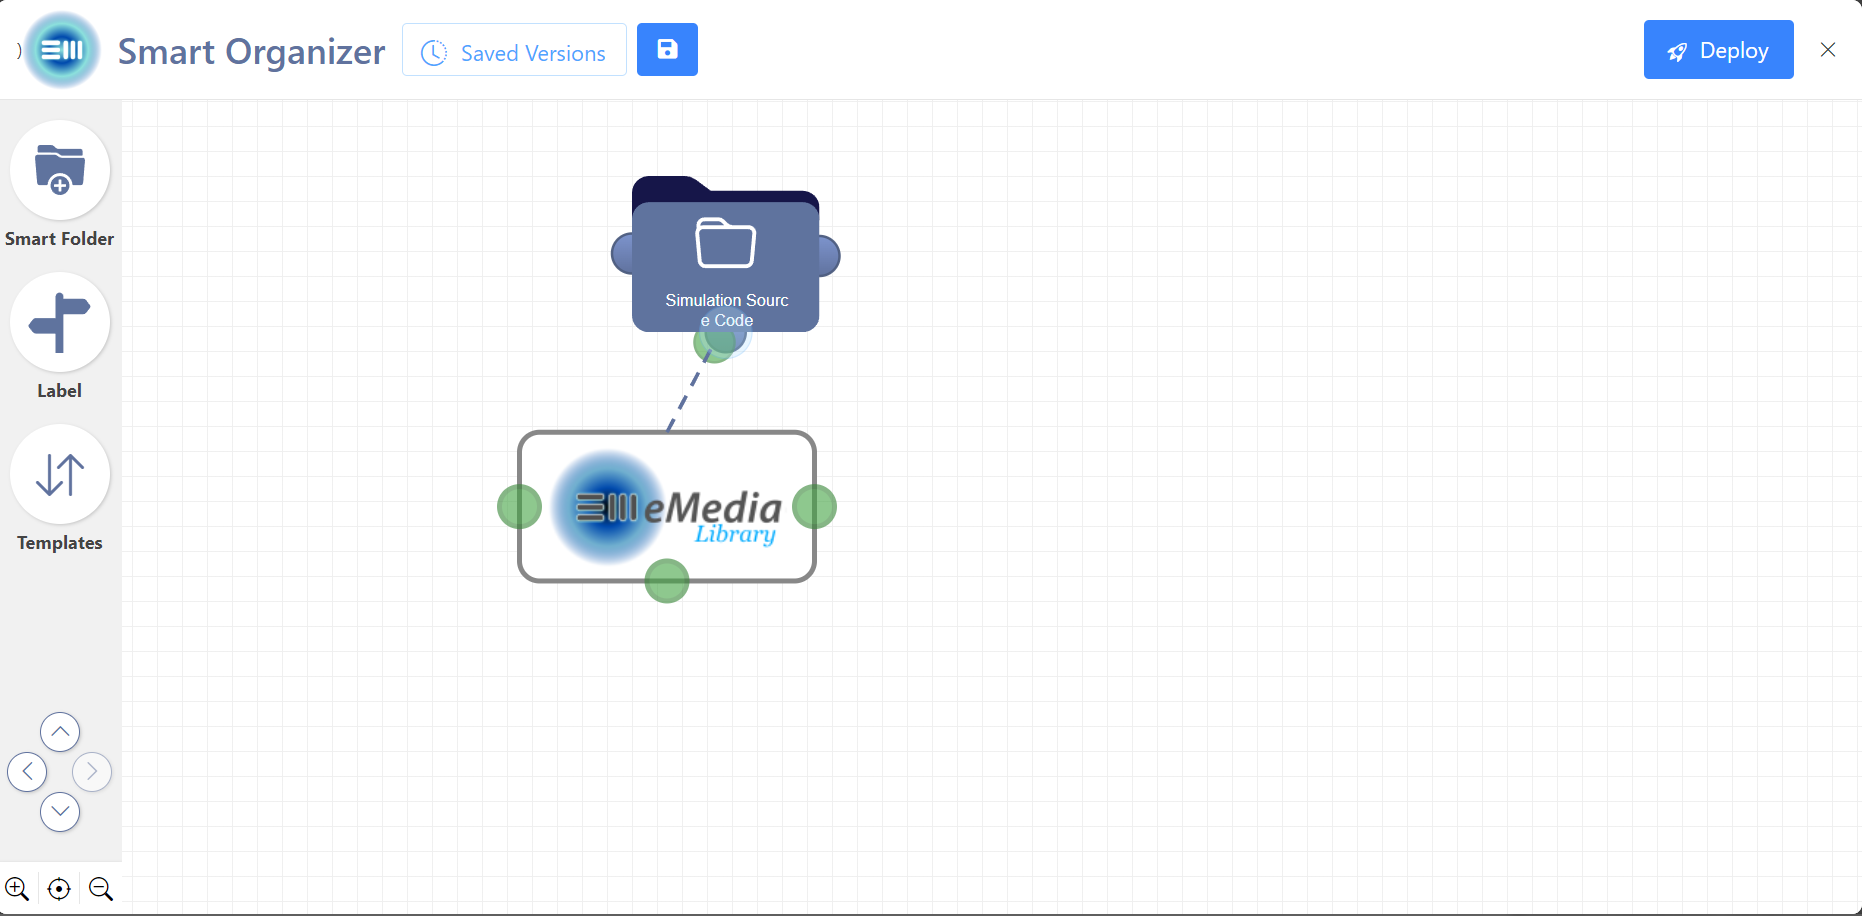
To create links from one Smart Folder to the next, click on one of the bulges on the icon and slide to the desired folder to connect to.
2.3. Deploying and Testing
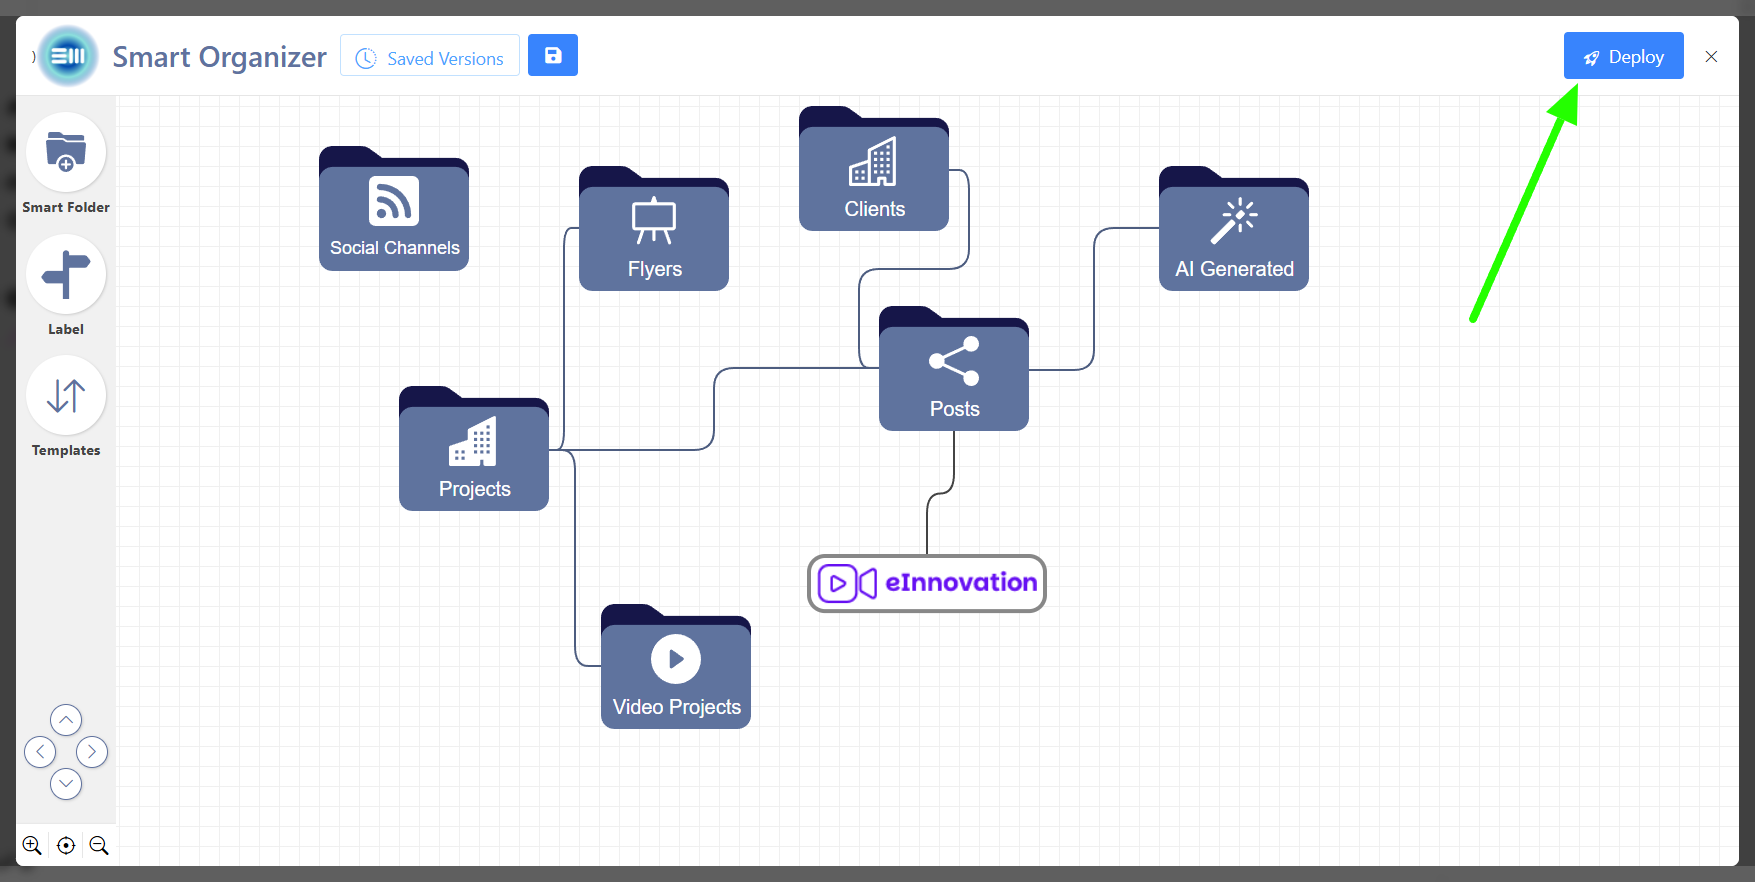
Once you have your folders in place, click on "Deploy" button in the top right of the app. This will save your template and reorganize the menu and features within the app to your specified folder structure.
2.4. Adding Fields
We have a customizable field area to help you better organize and find your data.
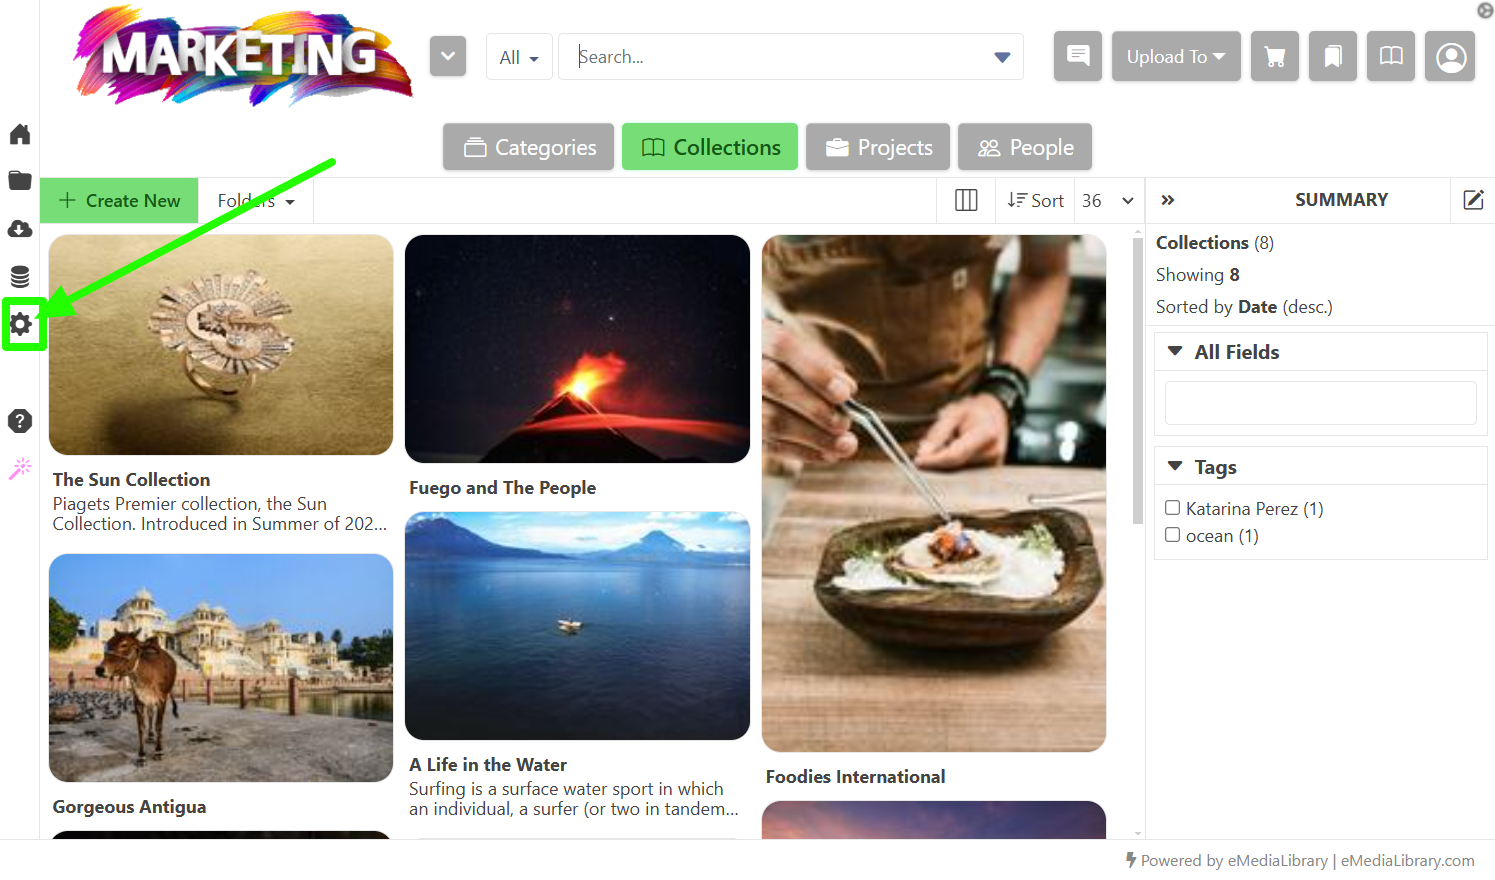
To edit the fields displayed, we will have to go into the inner guts of your library.
To go deeper into your library, click on the left side vertical menu and look for the gear icon.
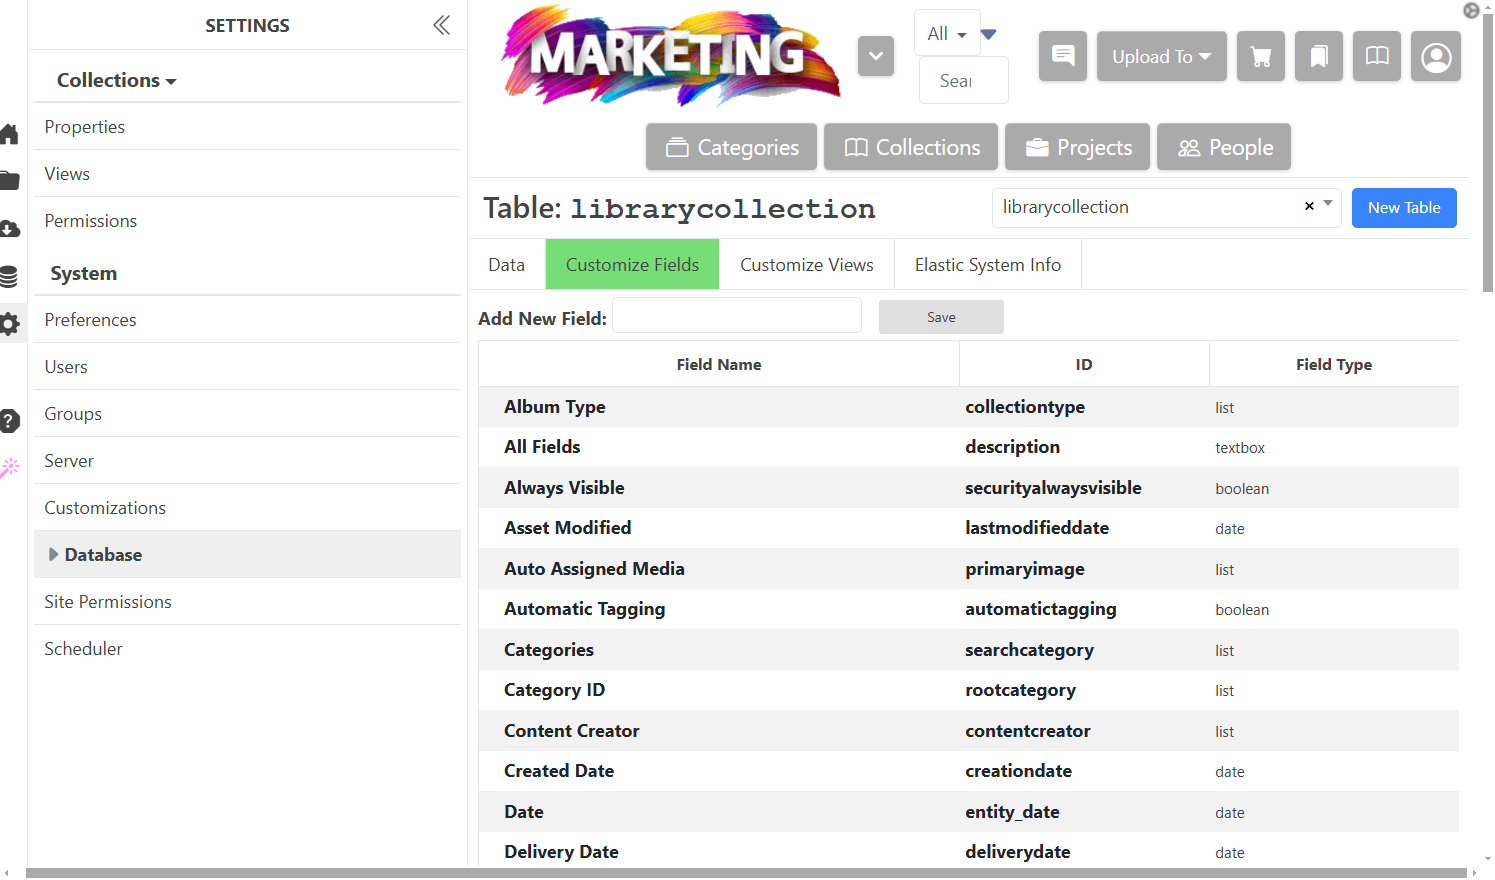
From here, click on "Customize Fields" from the menu.
You will be brought to the screen below.
These are all the field variables that you can edit. Please refer to our
documentation herefor further information on the specifics of each variable.
2.5. Working with Lightboxes
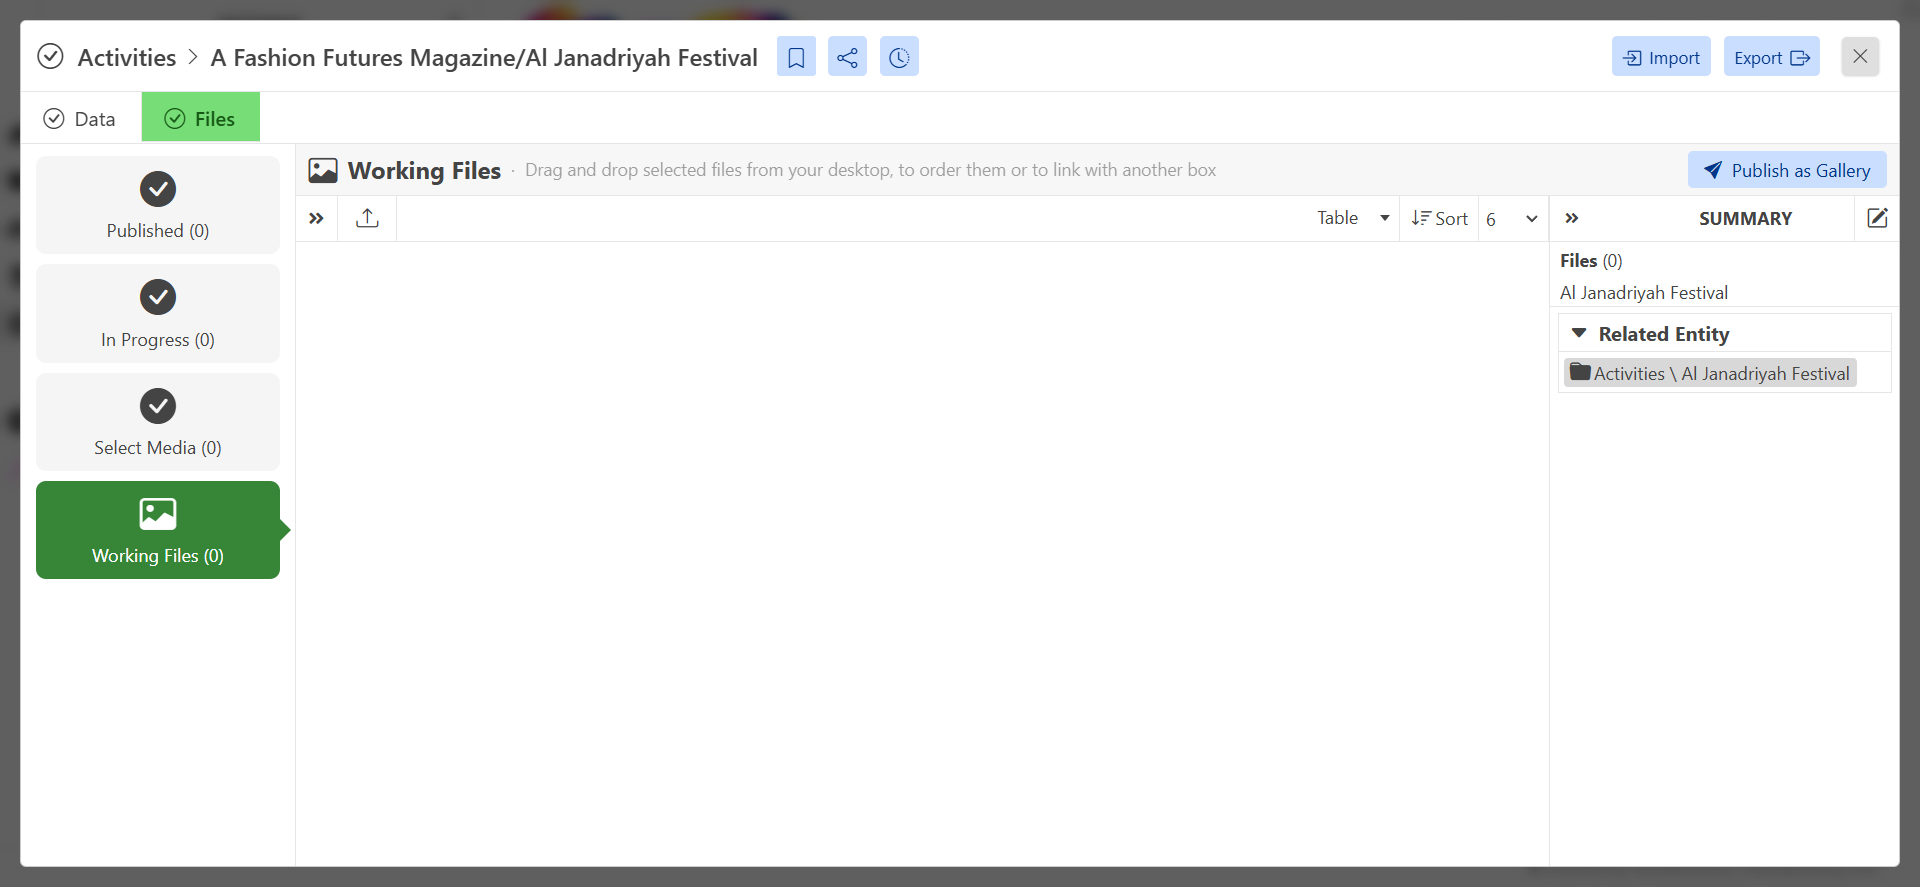
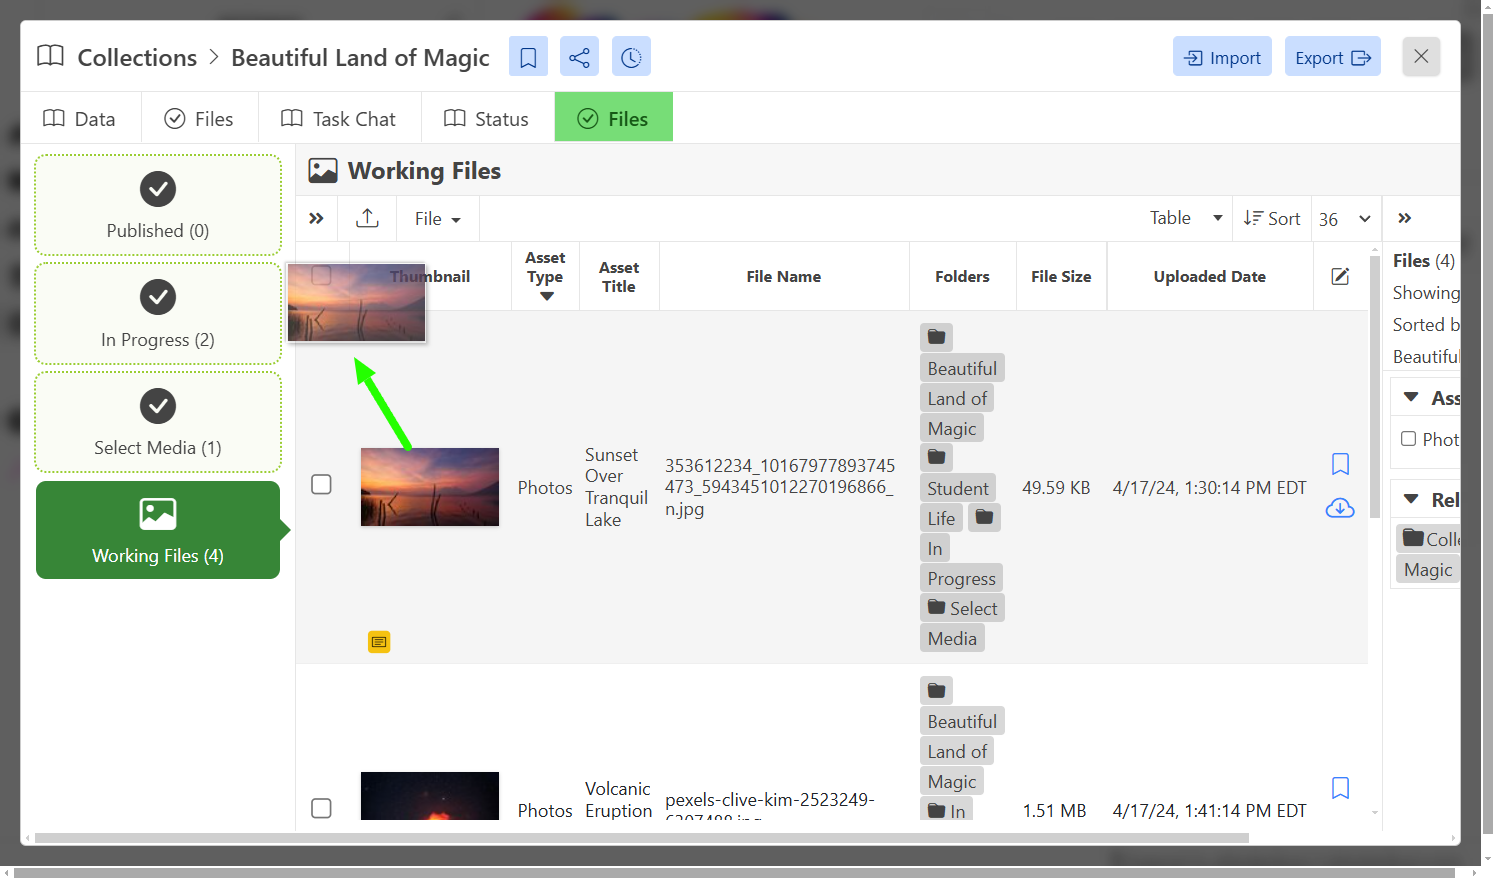
Light boxes are a default interface for files and collaborative organization within Smart Folders. The image below is an empty Lightbox.
From your dashboard, access any folder and click on the "
Files" button on the top bar menu. This will bring you to the lightbox view of that specific folder.
The squares on the left side are differing categories you can classify your files in.
Published: Finalized content that has been or is ready to publish.
In Progress: Files or content that is currently being worked on and not ready for posting.
Select Media: The Media you have selected
Working Files: All the content within that file.
Additionally, when you edit your content, such as photos, from within the built-in editor, a copy is made and both are now accessible from within the folder. Thus you can have one photo, with different edits, within separate organizational classes.
As you edit a photo and have a copy, you can have the original in "Select Media" and a polished version in the"Published" section and even a different variation in the"In Progress" section.
To move any file from one category to the next, you can click and hold on to the thumbnail and just drag and drop it into the desired destination.
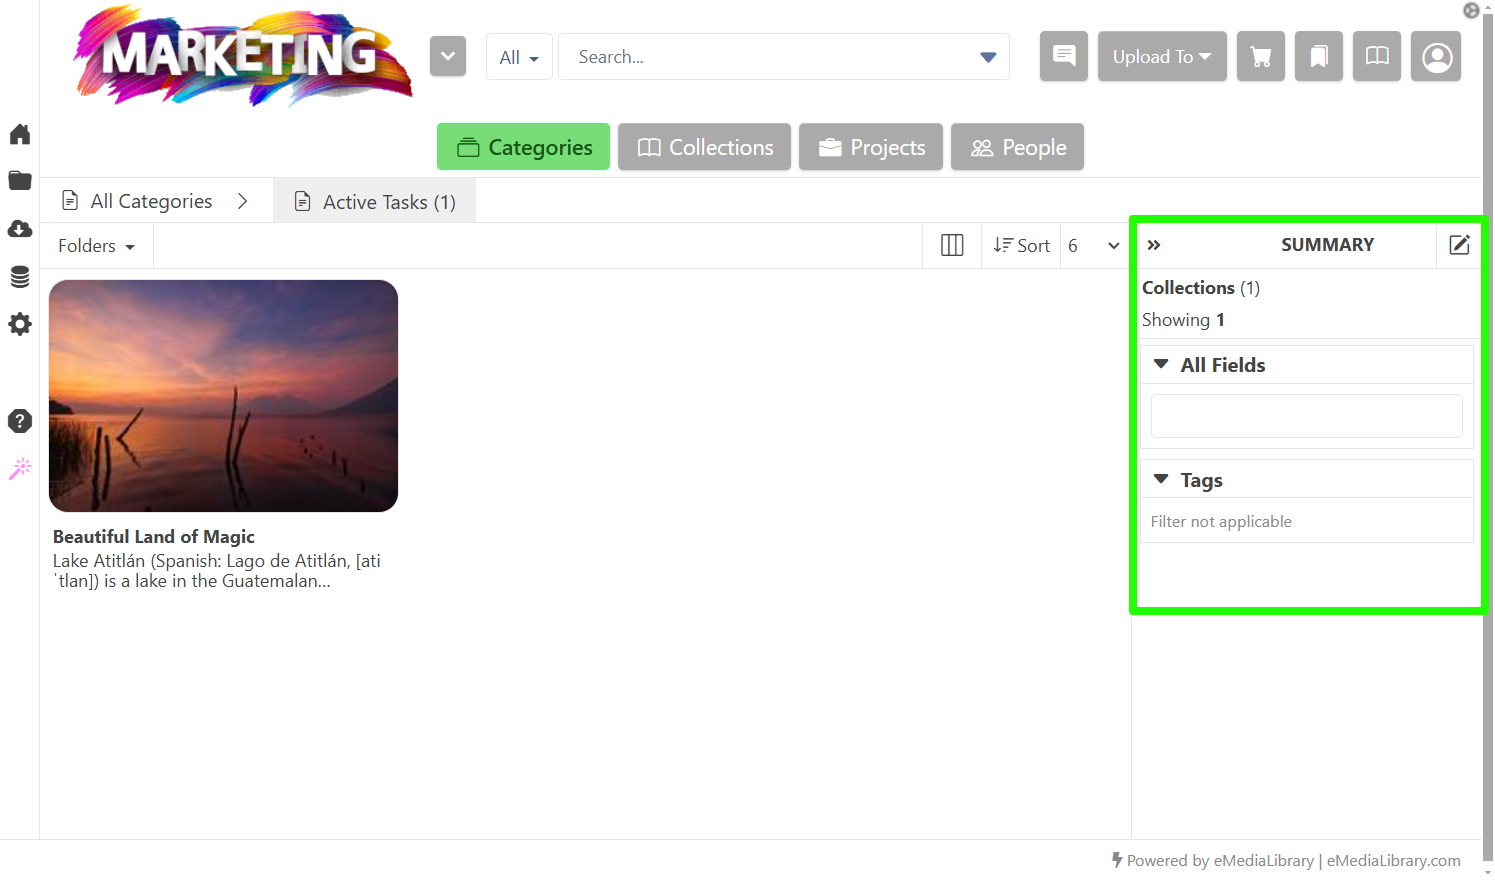
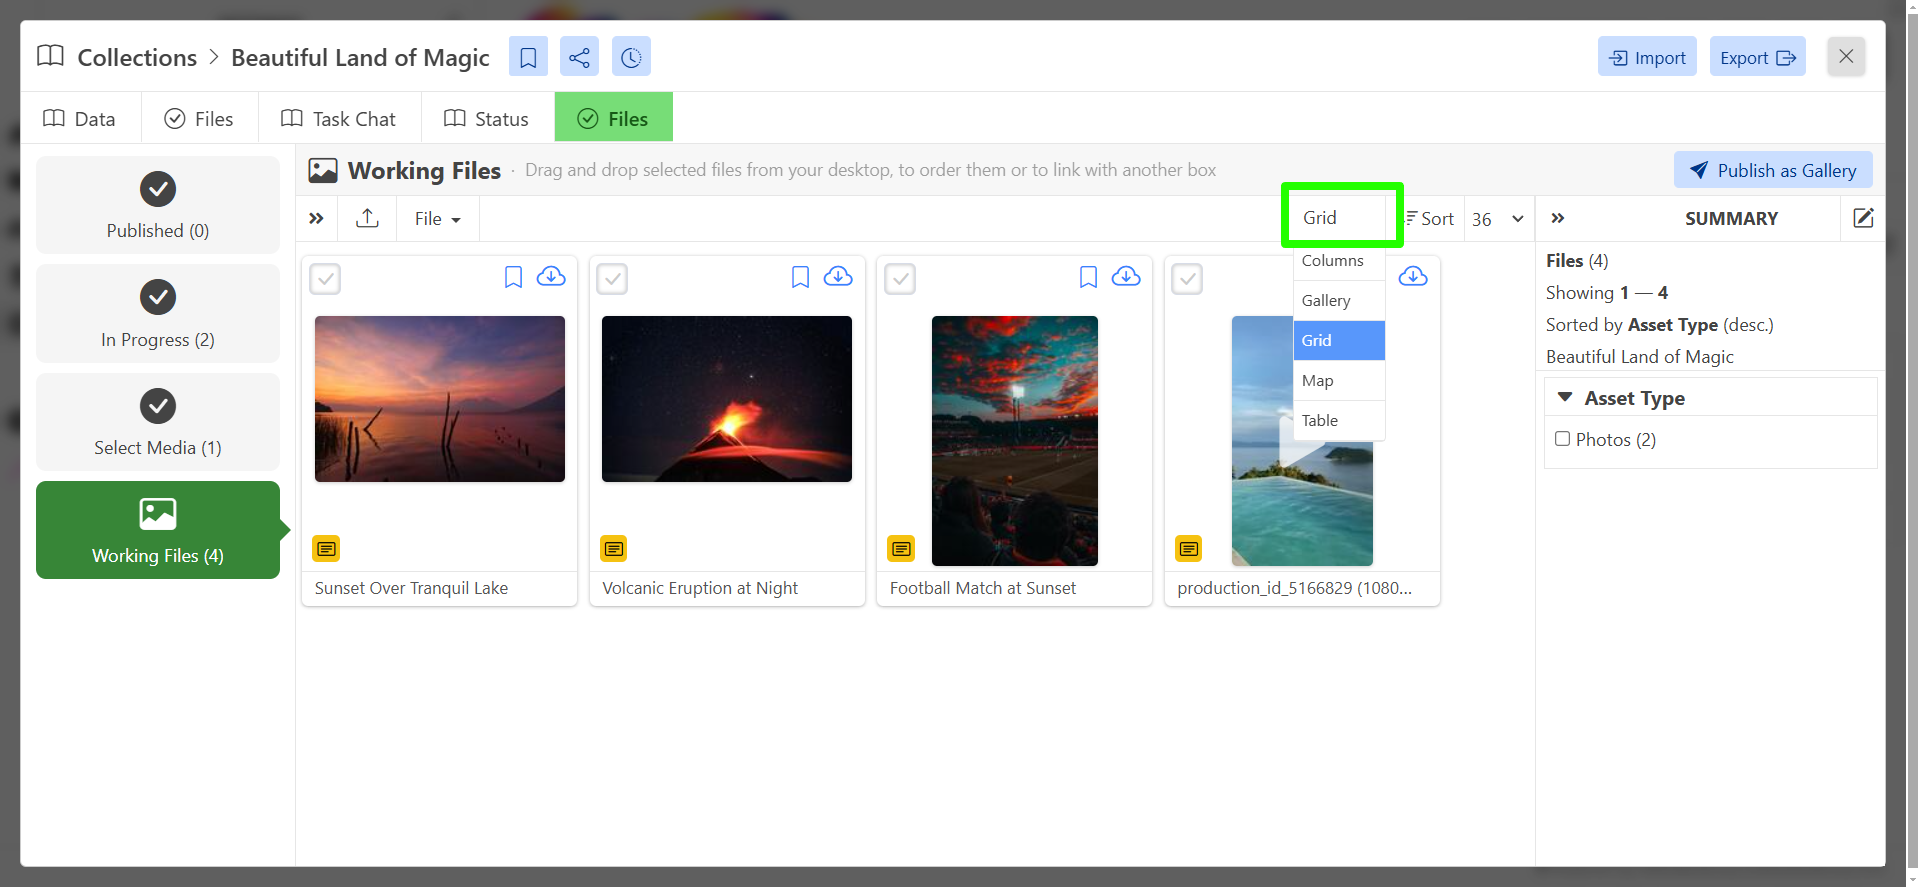
2.6. 2.6 Editing Lightbox display
You can change how your lightbox displays its data by clicking on the drop down box highlighted in green in the photo below. Select your preferred viewing style.
Next to the view style selector is also the sorter that can change in what order your data is displayed.
3. Add Content
Upload your already perfected content, or create your own from within the eMedia App!
Below are the instructions for both uploading content and creating your own with our built-in AI content generator.
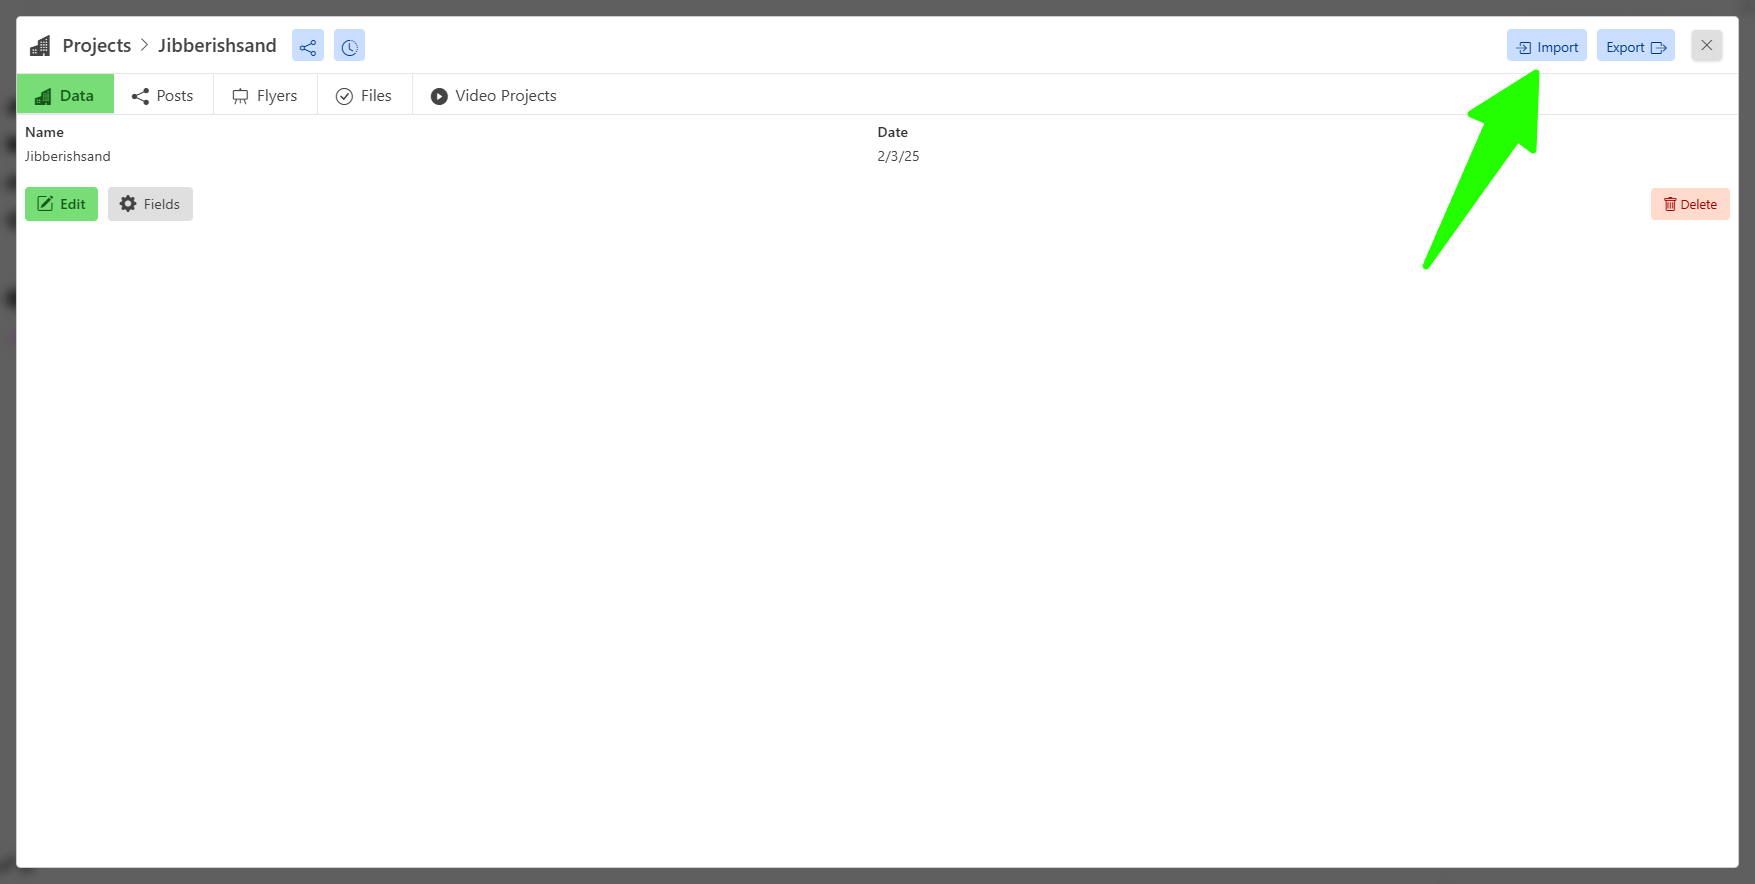
3.1. Uploading (drag and drop, folders)
From your desired folder, you can add files and content by clicking on the "
import" button on the top right.
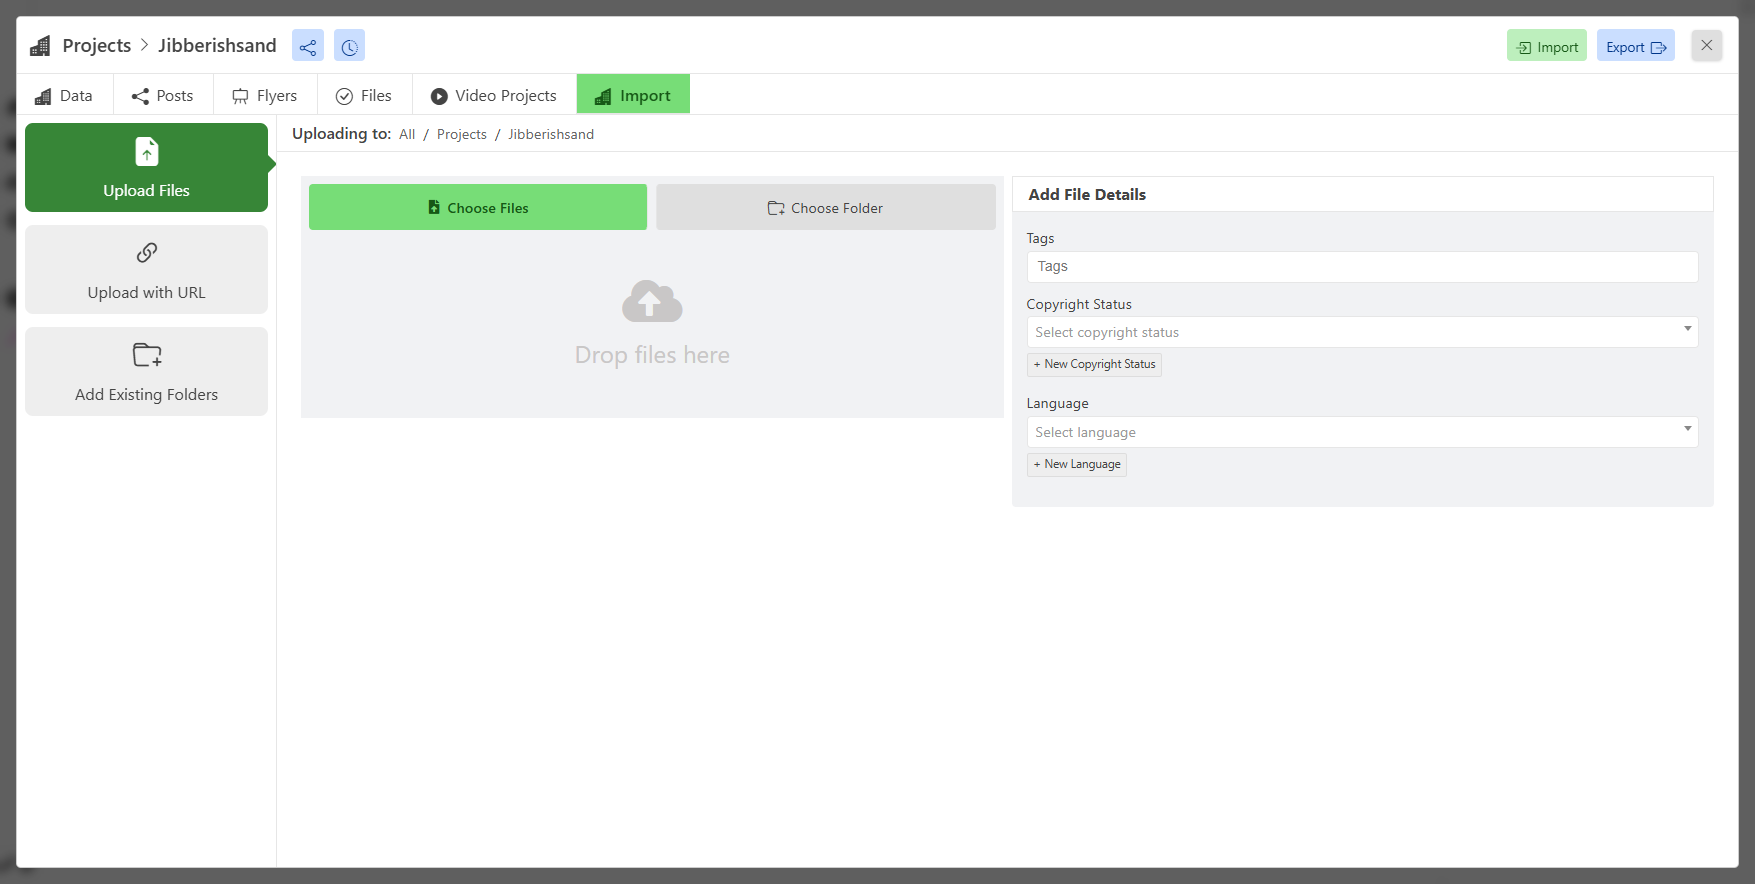
From this new page, you can see that you can drag and drop individual files, or entire folders for upload.
On the right side of the screen, you have a few detail inputs you can fill in for organizational purposes. For most, "Tags" are useful inputs to aid in organization and retrieval.
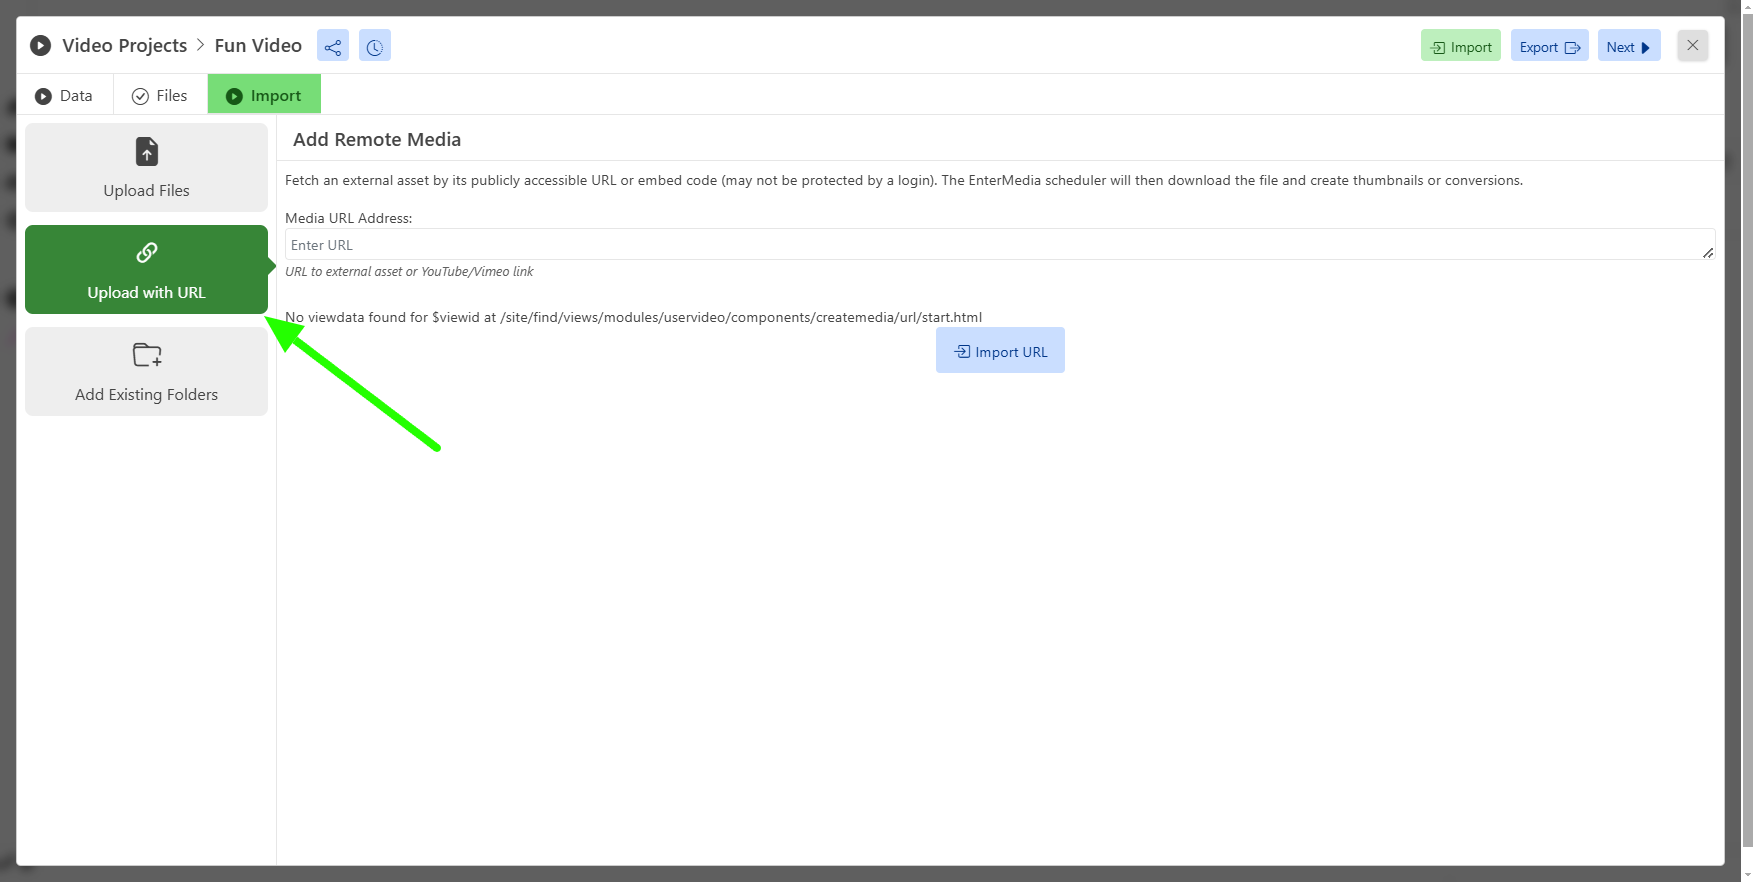
Additionally, you can also upload content via URL by selecting the proper tab on the left side of the screen.
This will take you to a new tab with an input box requesting the URL you wish to import from.
3.2. Use AI to create content
We offer a built in AI content creation option within our Smart Folders! Easily create an image to visualize your ideas.
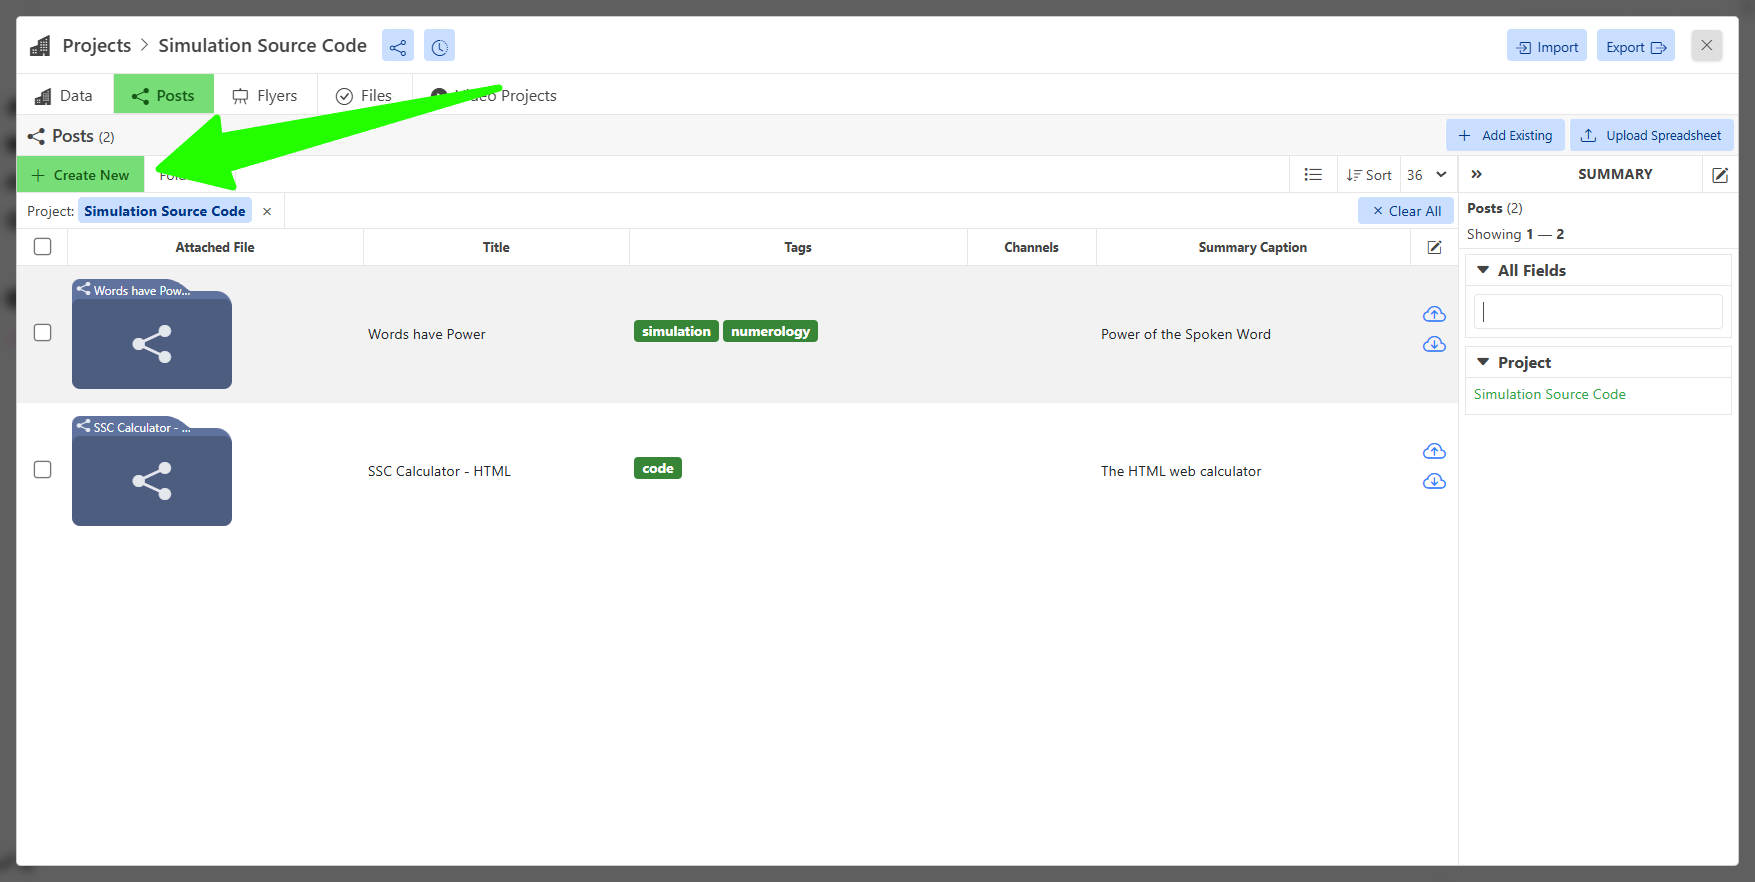
Within any folder, you can click on the green button on the top-left labeled "
Create New." This will create a new file within the folder.
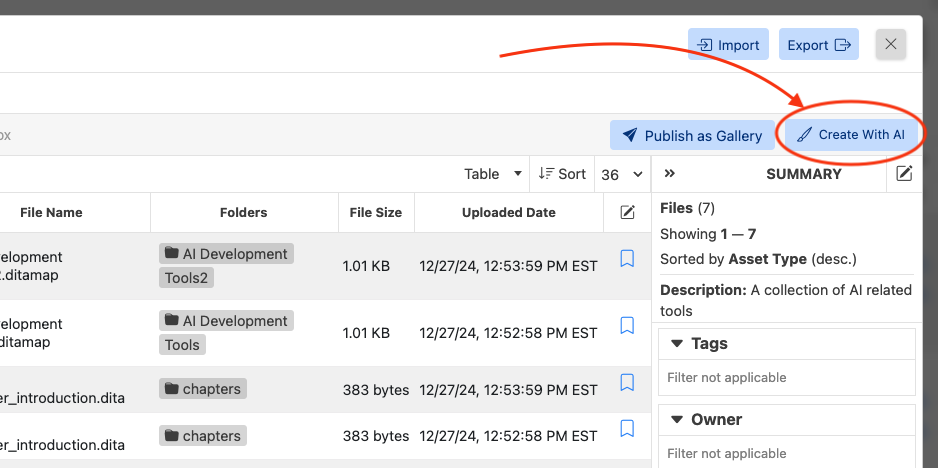
In the newly created file, we have a "
Create with AI" button at the top right.
When clicked, it brings you to our AI interface with prompt interface for you to fill in, instructing the AI on what to create.
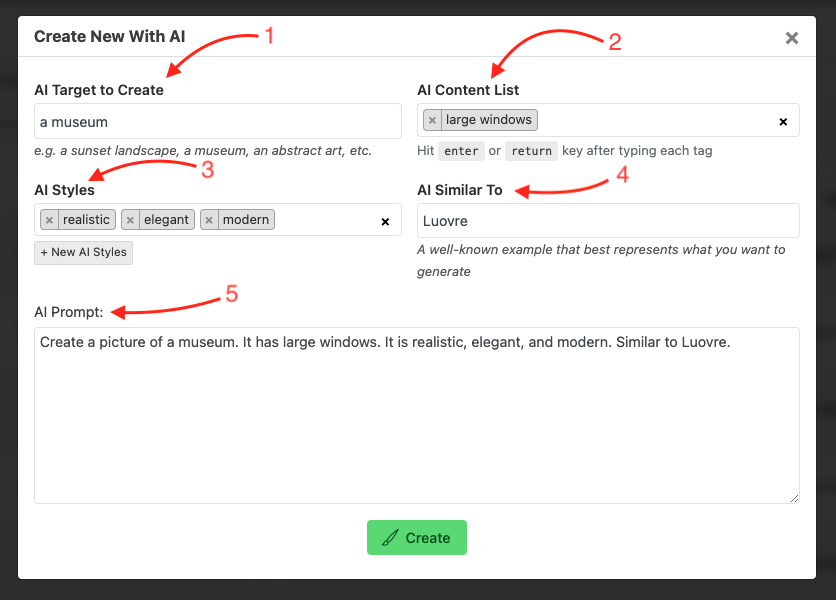
Below you will find details on each input field.
Al Target to Create
Type the primary subject of the image in this field (e.g. a cityscape, a rubber duck, a car, etc.)
*This is a required field.
AI Content List
You can optionally enter any additional secondary subjects or details that you want your image to have.
AI Styles
You can specify the styles of the image, like whether they should be realistic or illustrative.
AI Similar To
You can provide a real-life example of something similar to what you want to create.
AI Prompt
This shows you the generated prompt based on the fields above in real time. You can add more context manually if needed to expand upon your creation.
Fill in the form and click"
Create" which will start the generation process. This may take up to several minutes. In the mean time, you can close the window and continue with other tasks.
Once the AI has finished generating the image, you will see it in the"
Files" tab.
3.3. Opening Folders on Desktop
We also offer a downloadable desktop client to easier work on your projects and edit content.
Our desktop App also makes it easier to work on your projects and syncs to the eMedia Library data, making content creation even easier!
Any project can have multiple collaborators to enhance workflow.
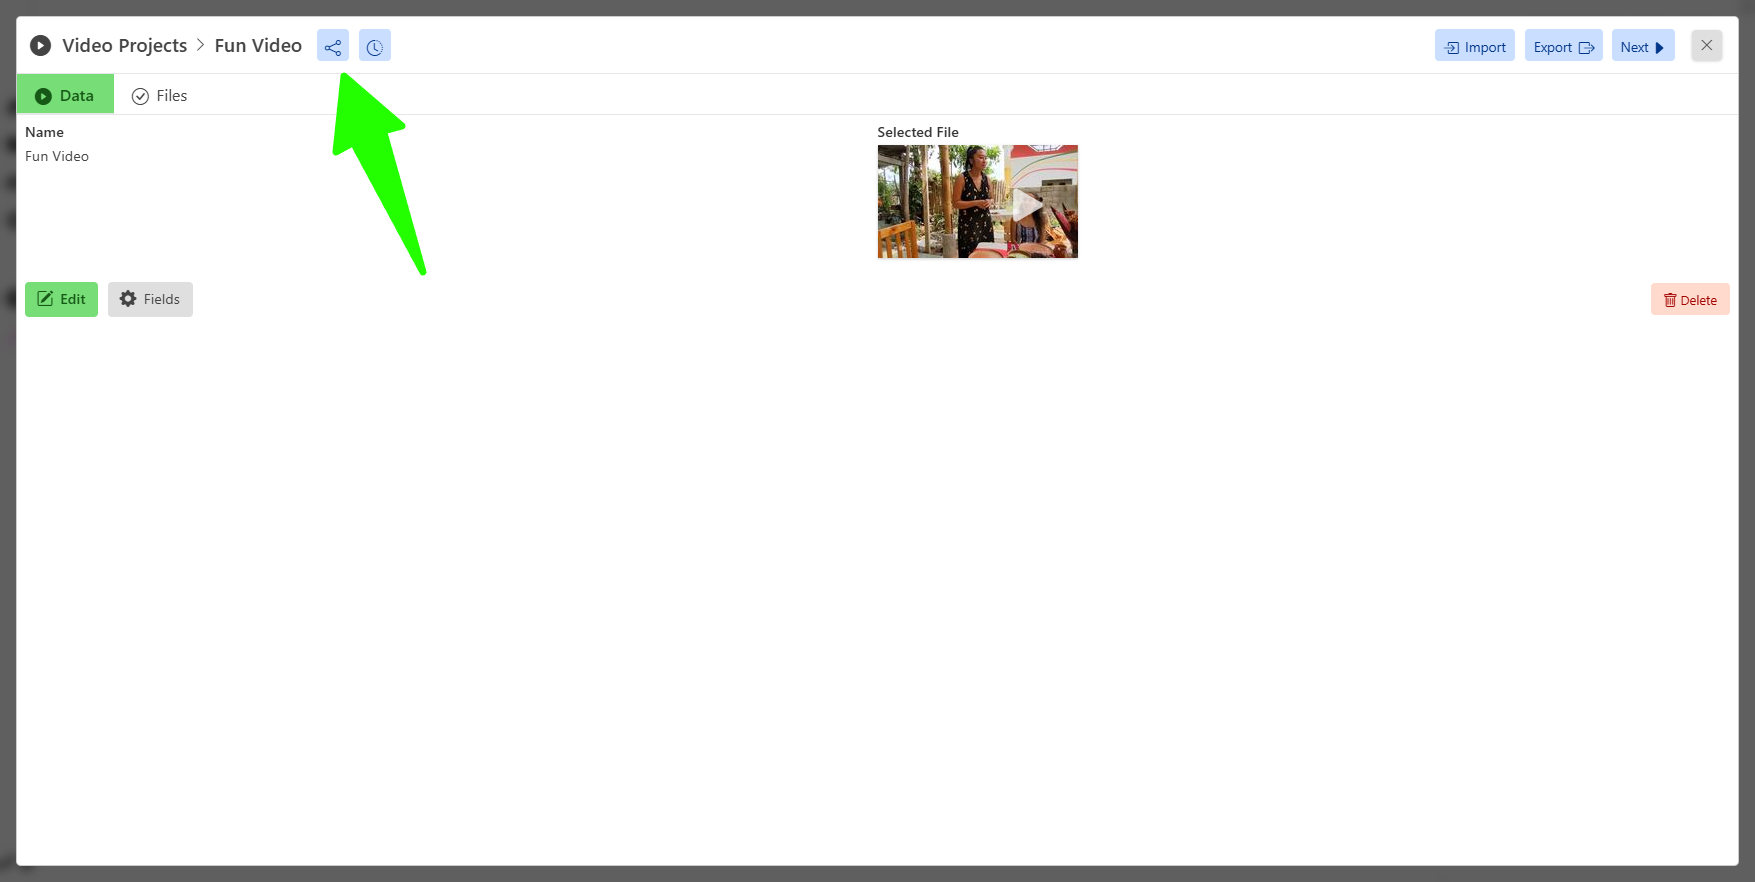
Each individual folder has a share button, denoted by the "
Share" icon we are all familiar with.
This will take you to the "Share" page, which has many options to share your content. For now, we only wish to collaborate with others and so the default page will suffice for our needs.
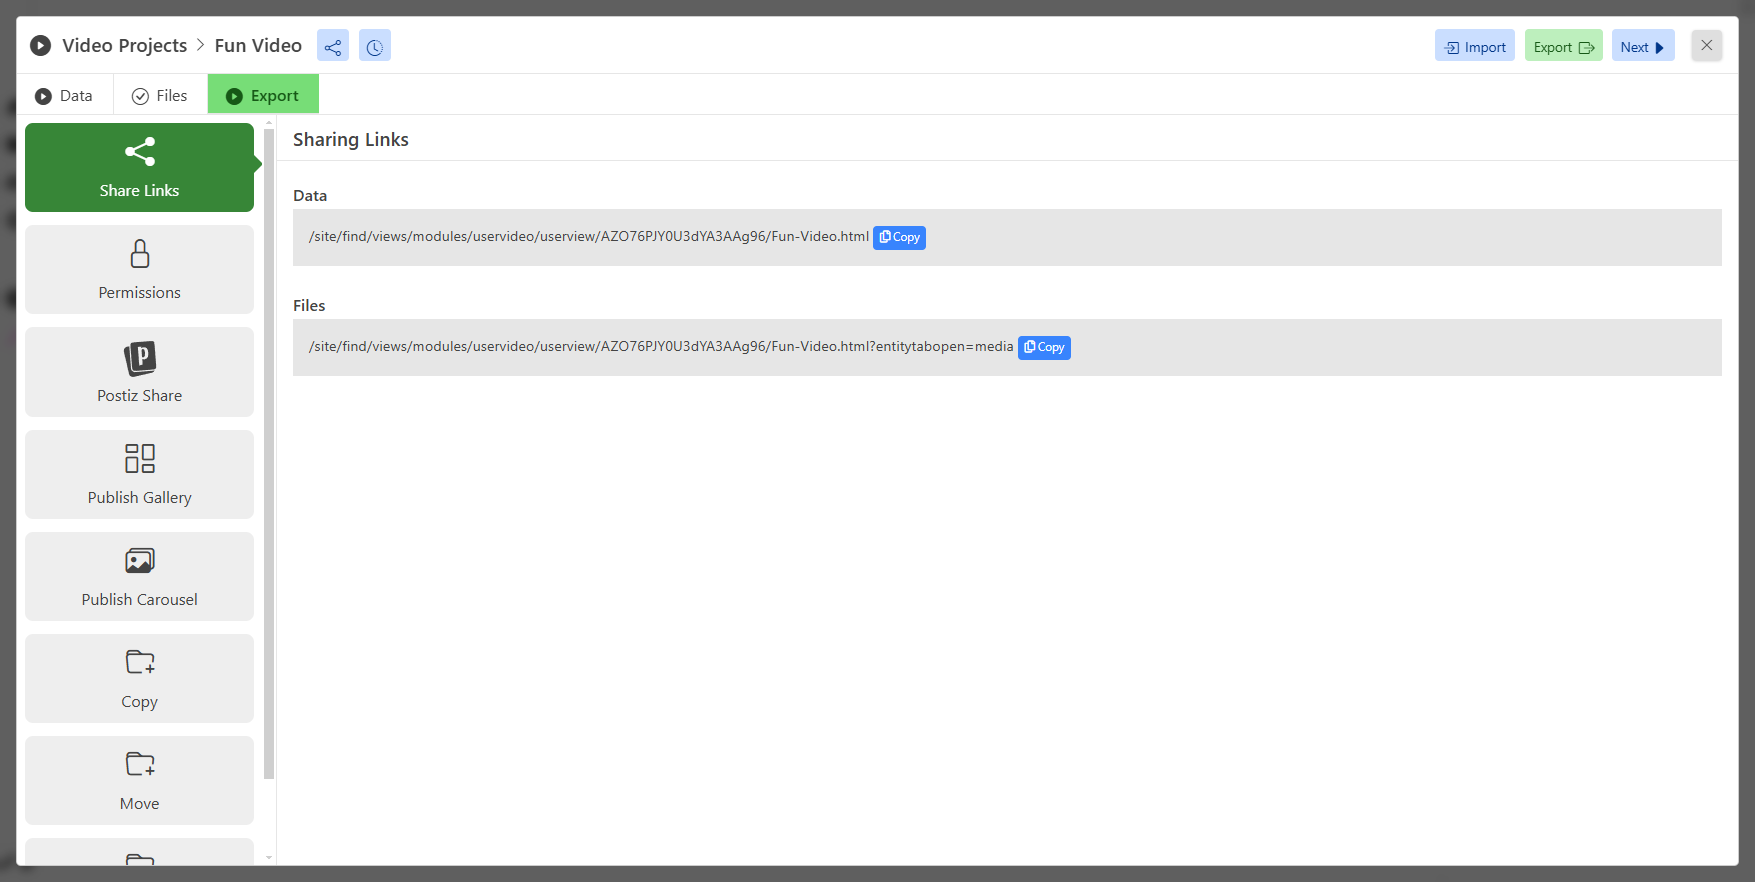
4.1. Share a link
Each folder will provide its own URL to share. This aids in delegating specific tasks to individual people and maximize overall project security.
The default available URL links for sharing are already customized to the specific folder from which you clicked the"share" icon.
Simply copy the link, either through highlighting or clicking the "
copy" button and send it on its way!
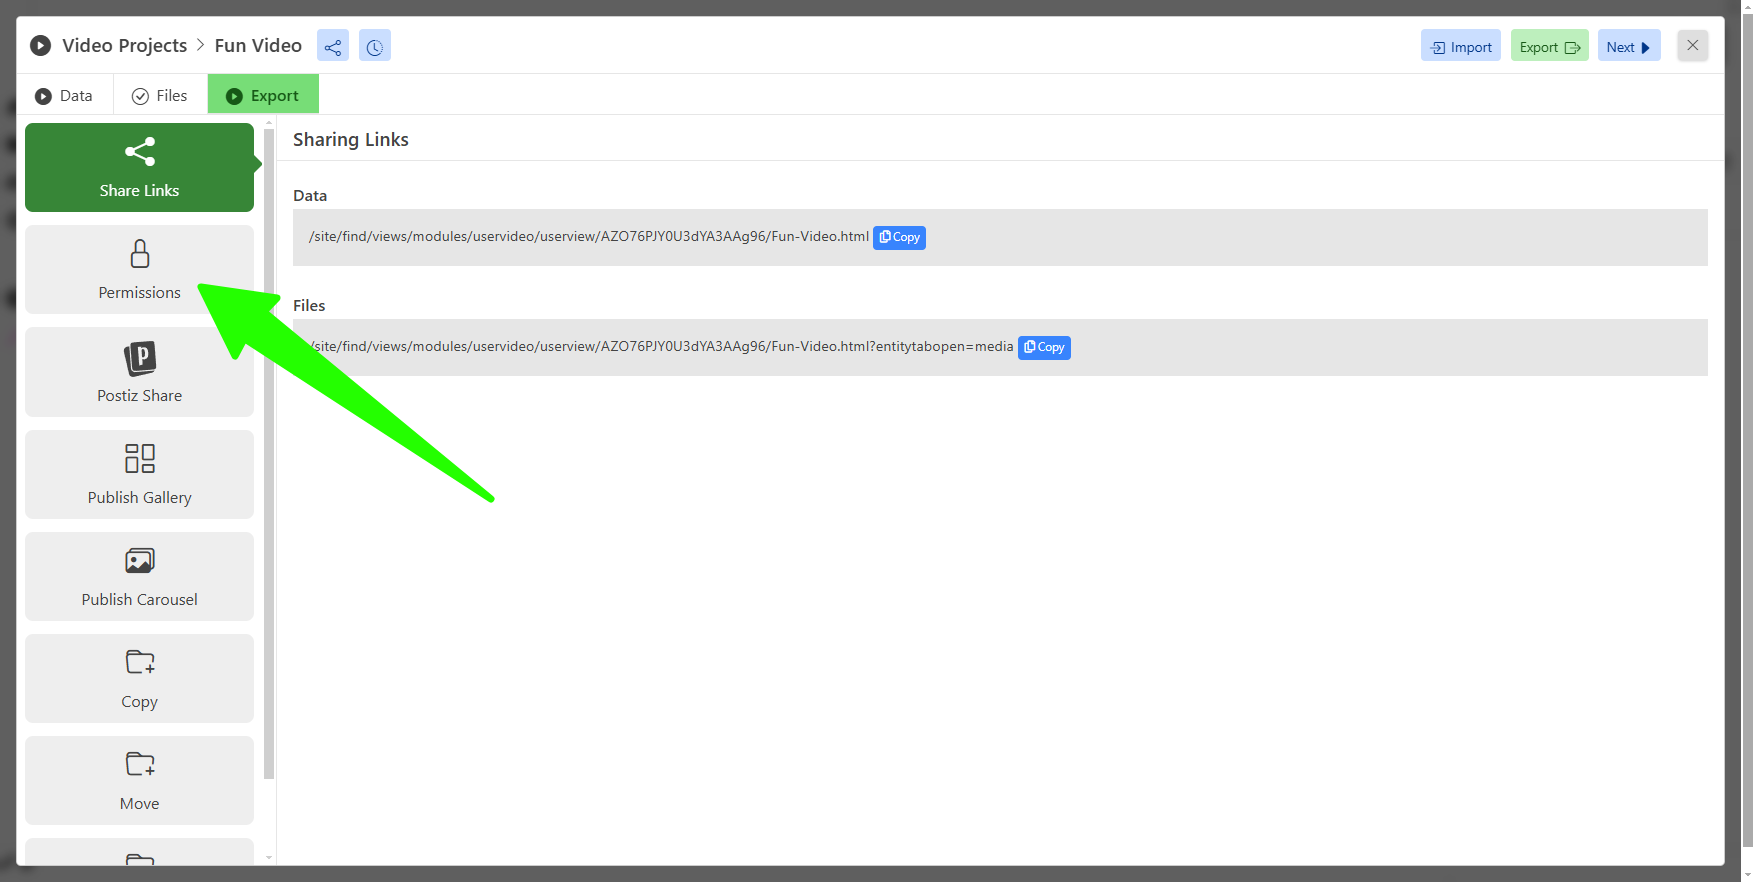
4.2. Permissions
Our share options can be customized depending if you want the receiver to view or edit the contents of the folder.
To access permissions, click its specified tab on the left of the screen.
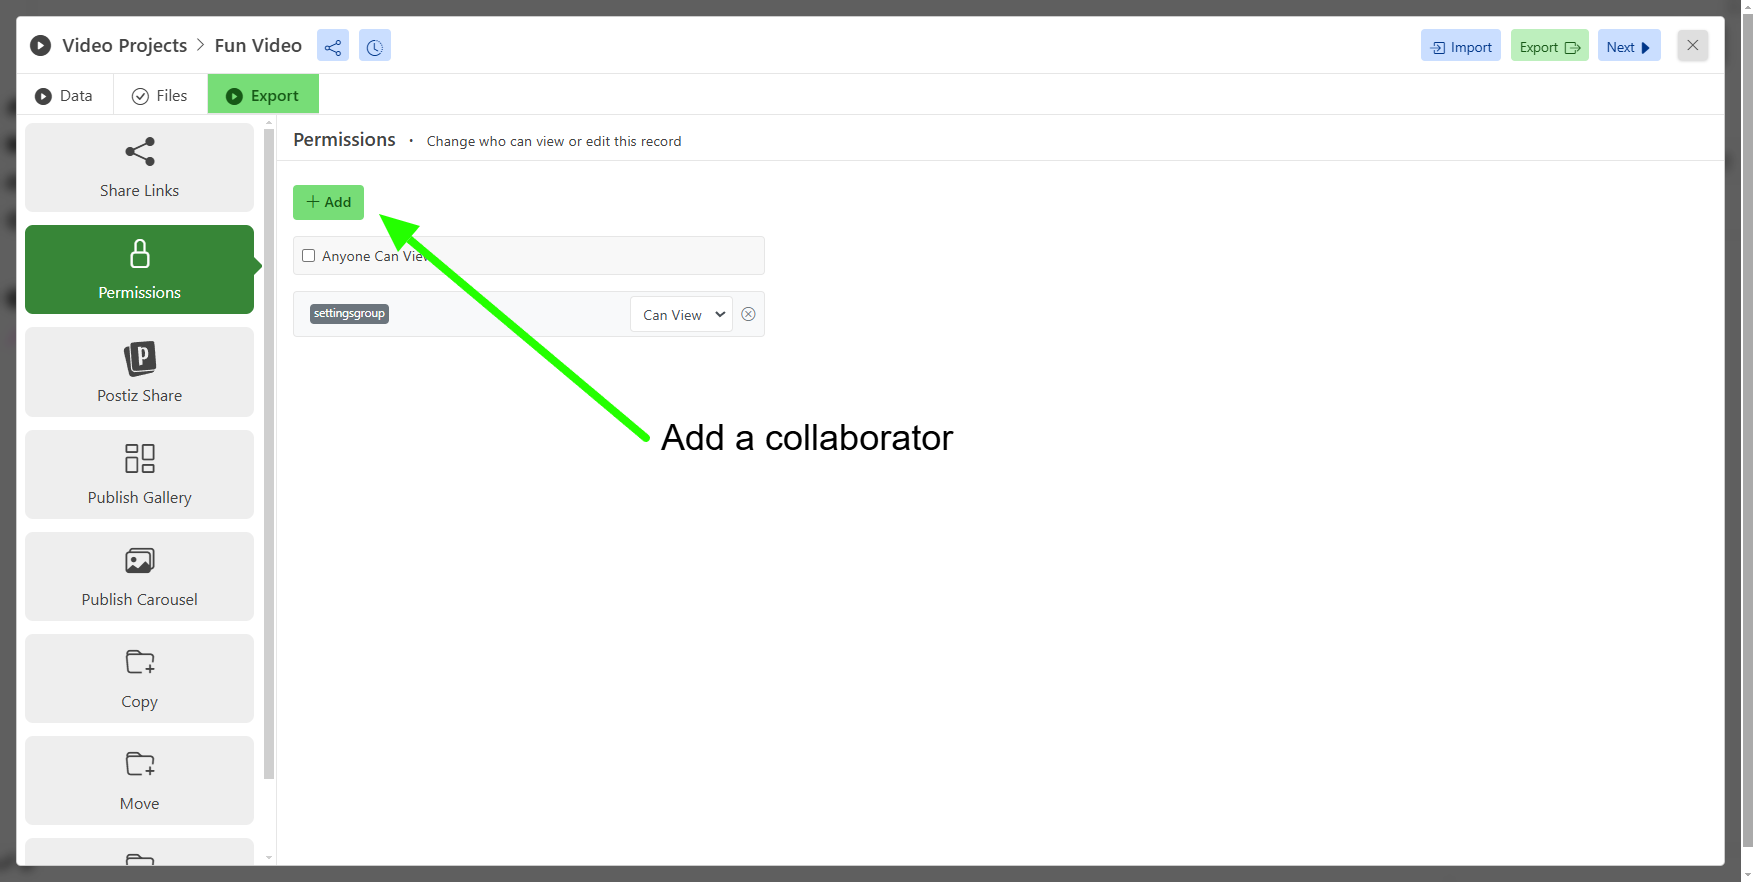
From this page, you can also add new collaborators via the green"
+ Add" button and inputting their email address.
4.3 Share on Social Media with Postiz
eMediaLibrary is integrated with Postiz, allowing you to easily share your post data and photos made and stored within your library! Allowing you to effortlessly have your library as your website and social media hub and back-up storage.
This is a beautiful step in the right direction for efficiency in content creation and marketing your brand and/or products.
To do so, follow the directions above within the file or photo you wish to share. It will take you to the same "Share" screen as above. From this screen, we will want to click on the "Postiz" button on the left menu bar.
From this screen, you have the drop box asking for which profile you wish to post with. Select your desired profile.
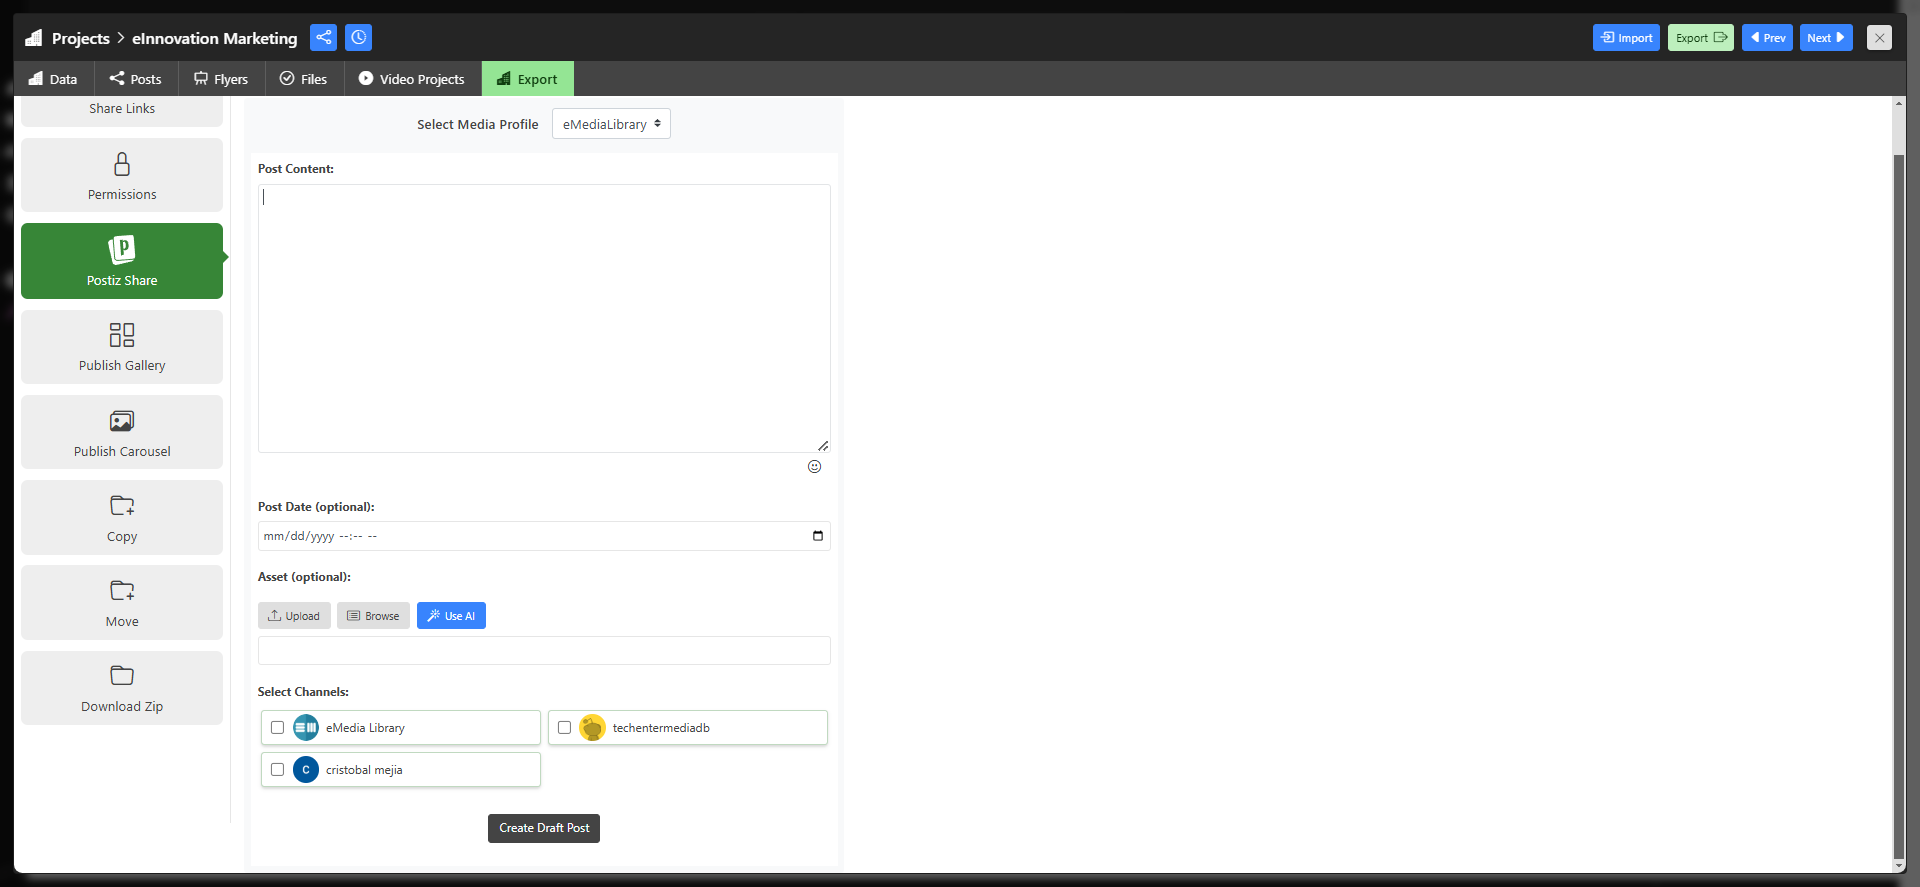
Once a profile is selected, the following screen will appear.
From here you can fill input boxes such as "Post Content" and select the desired date you wish for your post to be released to the world.
The"Asset (Optional)" line of boxes is where you will select the images for your post. You can upload new photo media, browse your data base or even use AI to create an image for you! Thus even improving efficiency for content creation even more.
The final section is the area of platforms. select which platforms you wish your post to post to.
For a more in-depth walkthrough for how to use this feature, refer to our
Documentation.
5. Customize the User Interface
The end use case of eMedia's innovative software is to not only organize and secure your data, but also properly display the content of your choosing into a basic landing page.
The ability to display the data of your choosing is essential to having an intelligent library.
"
Knowledge not shared remains unknown"
-Chris Grabenstein, Escape from Mr. Lemoncello's Library
You can make your library your own by branding your setup and display to your own liking. This is perfect for business or content creators that wish to create and promote a "brand."
5.1. Edit your theme
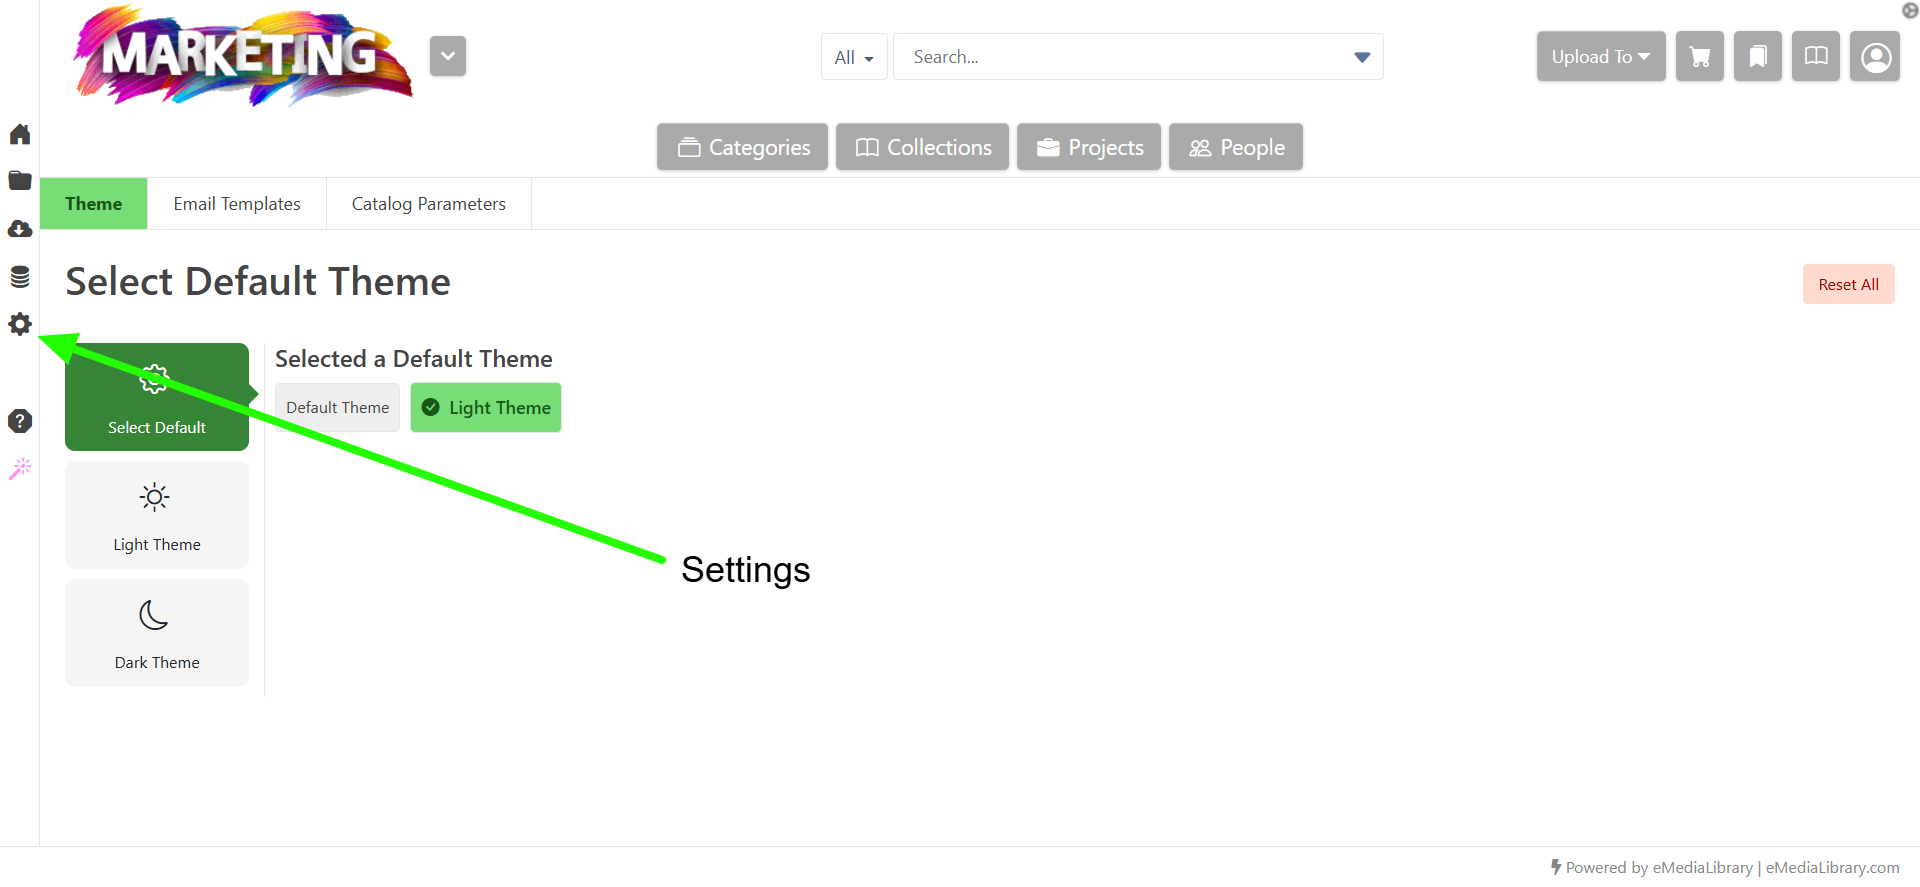
From within your template, click on the cog icon in the side bar on the left side of the screen.
The cog will bring you to the page above, from which you can select your personal view of "Light" or "Dark" mode.
Depending if you prefer Light or Dark, click your desired tab on the left.
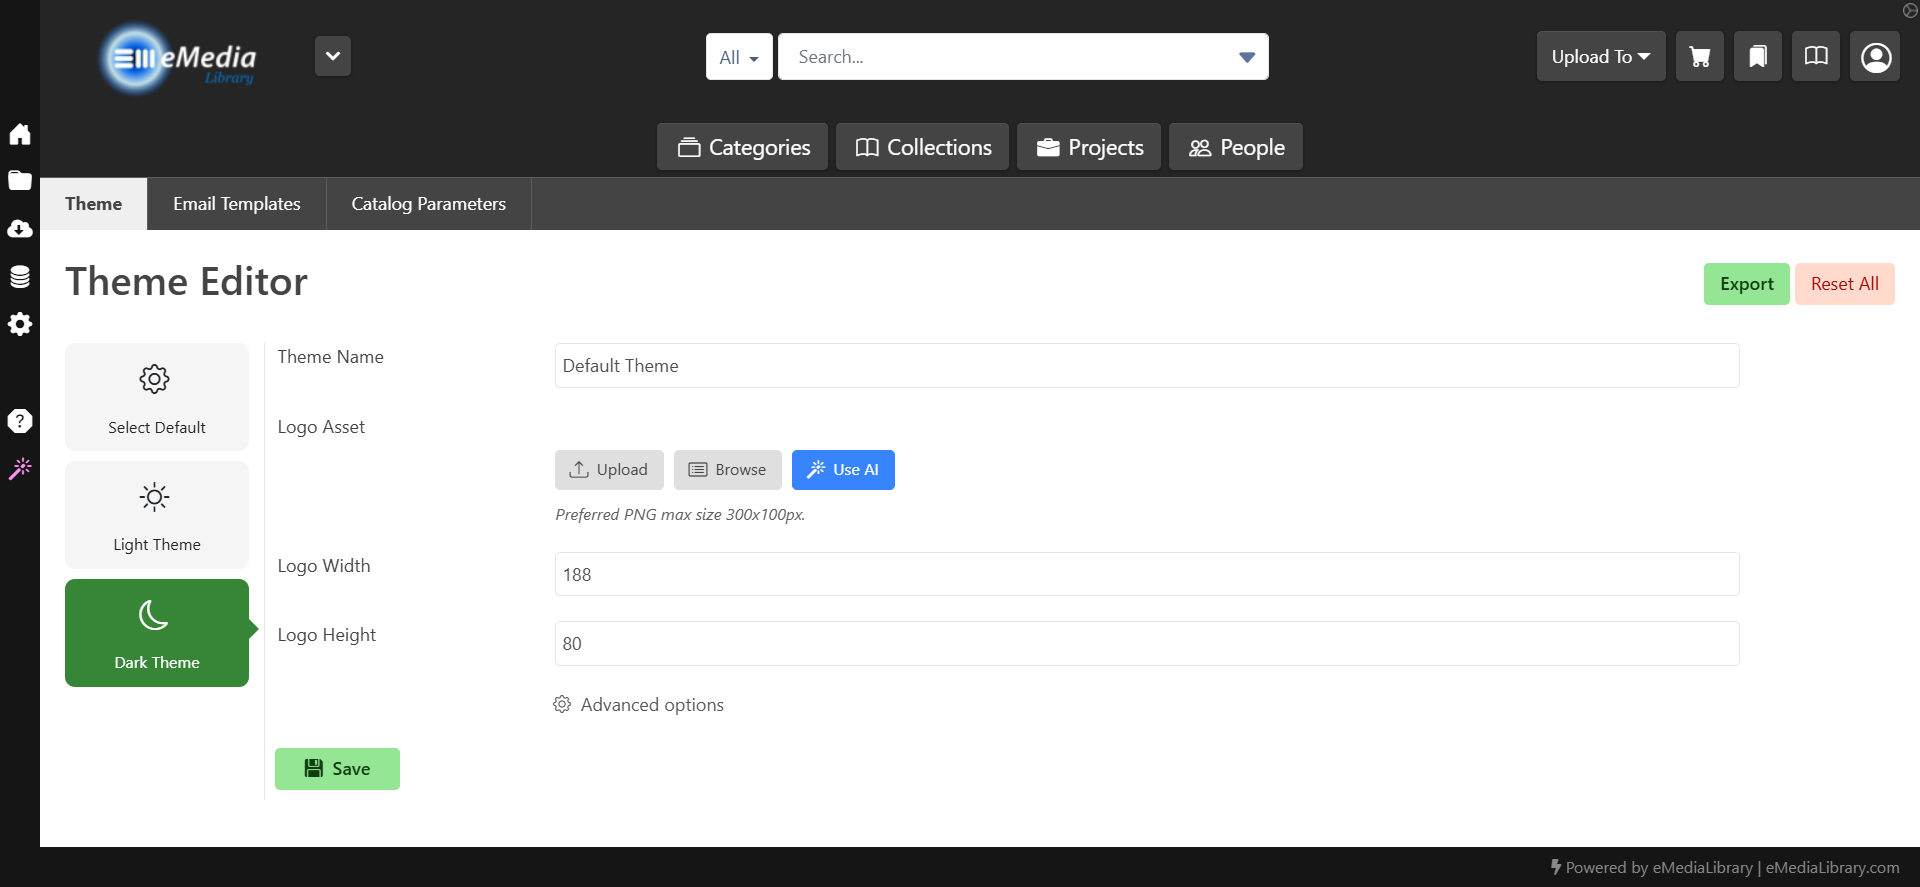
From this page, you can upload your brands logo or generate a logo using the blue AI button.
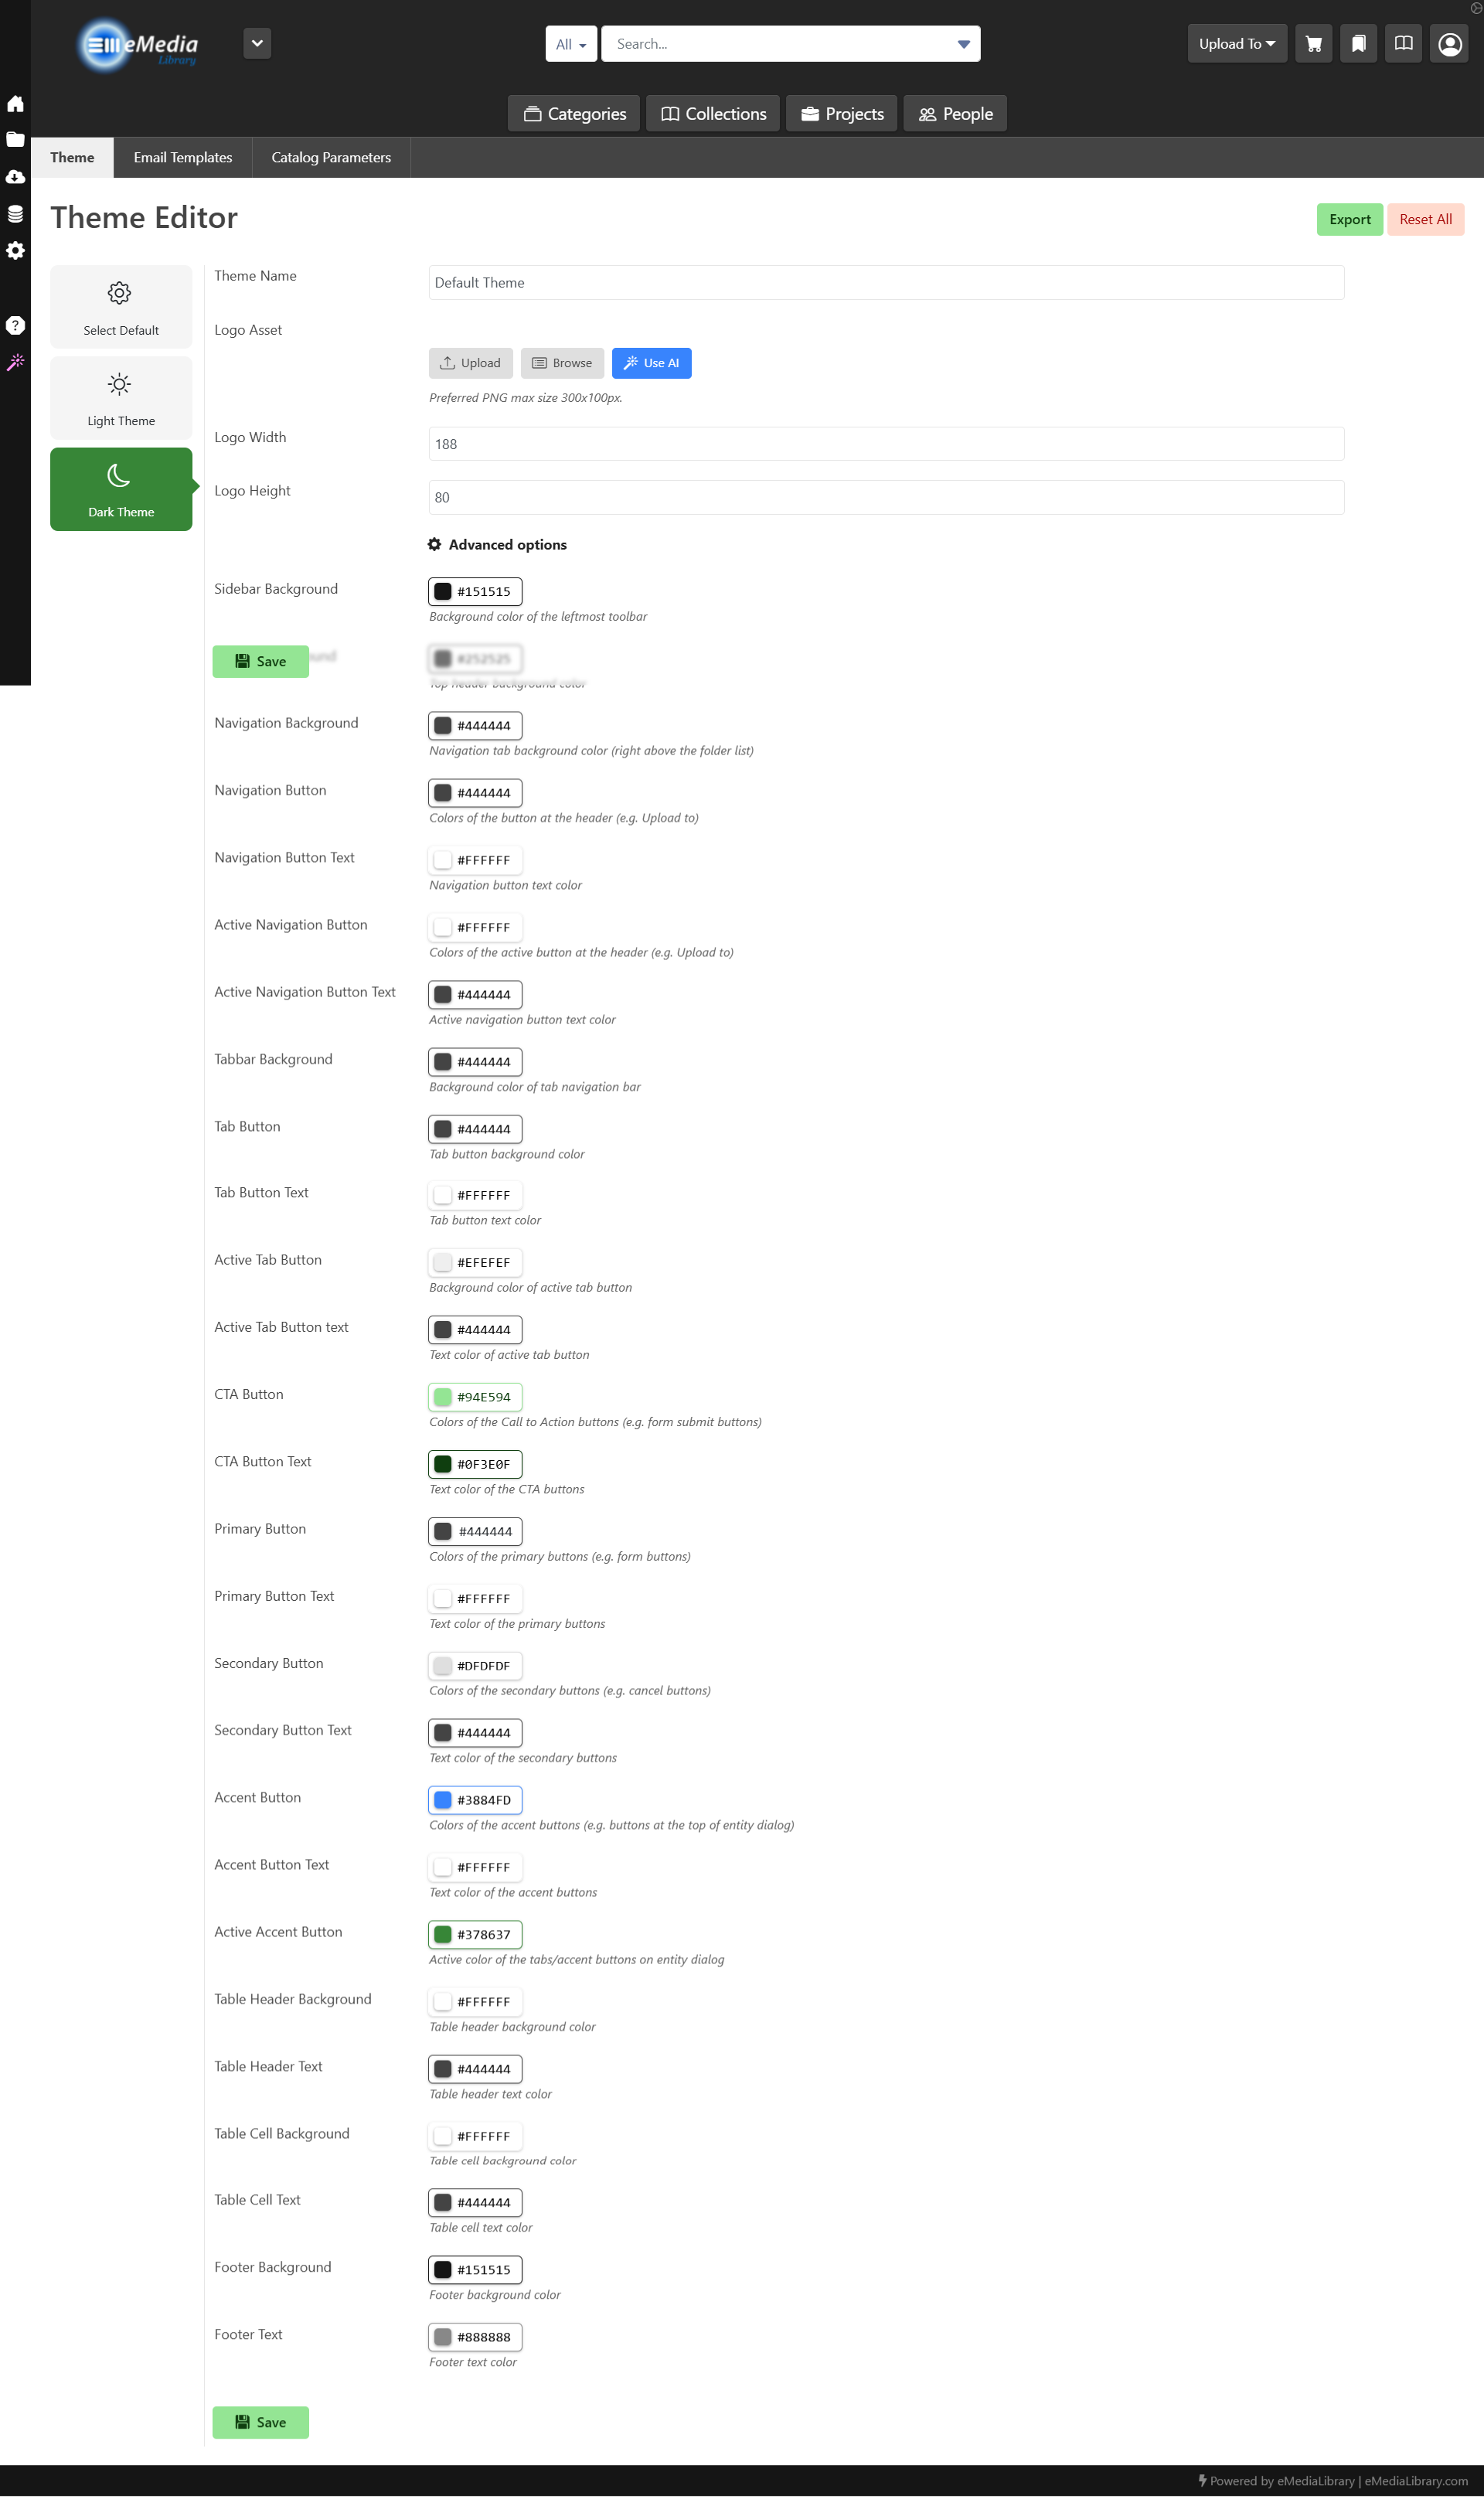
Below the logo options, you can find the"Advanced options" button, from which you can further edit your templates colors.
5.2. Edit Landing Page
For the landing page, we have a HTML editor with a basic interface to edit your landing page. The landing page will be like your homepage on a website, acting as an interface to your content.
An in-depth "How-To" to edit your landing page can be found here:
6. FAQs
1. What is the eMedia platform?
The eMedia platform is a versatile tool designed for creating, managing, and sharing projects within your own, decentralized cloud server. It provides tools for video production, content management, collaboration, and distribution, helping streamline workflows for individuals and teams.
2. How do I log in to the platform?
Visit the eMedia platform's website.
Enter your registered email and password.
If you’re a new user, click
Sign Up to register and create an account.
3. What should I do if I can’t access the platform?
Ensure your login credentials are correct.
Check if your access level allows content creation. If not, contact support for assistance.
4. How do I start a new project?
Click the
New Project button on the dashboard.
Select the type of project (e.g., video, document, or presentation).
Name your project and choose a pre-designed template or start from scratch.
5. How do I add content to my project?
Click
Add Media to upload files from your computer or linked storage services like LucidLink.
Drag and drop content to organize it as needed.
Use the platform’s editor to format and enhance your project.
6. Can I collaborate with others on my projects?
Yes, you can collaborate by:
Inviting team members through the
Share tab using their email addresses. The
Sharetab is found at the top of all folders within the platform.
Assigning roles such as Viewer or Editor to control access levels.
Using the comment feature to provide or receive feedback on specific sections.
7. How do I render and share my project?
Click the
Render button to finalize your project into a desired format (e.g., MP4, MOV).
Preview the output to ensure quality.
Use the
Share option to generate a link or download the file for distribution.
8. What features enhance my workflow on the platform?
Tagging and Metadata: Automatically generate tags and metadata using AI tools for easy retrieval.
Version Control: Save different versions to track changes and manage edits efficiently.
Platform Integration: Link projects to external platforms for seamless sharing.
9. What should I do if I encounter issues?
Visit the
Help tab for FAQs, guides, and troubleshooting tips.
Contact support by submitting a ticket or reaching out via email.
Join user forums and webinars to learn advanced tips and tricks from the community.
10. How can I make the most of the platform?
Explore all features, stay updated with new tools, and utilize collaboration options. The eInnovation platform is designed to adapt to your needs and help you achieve your goals efficiently.