Facial profiles and People - Choosing profiles to link to people
Facial profiles and People - Choosing profiles to link to people
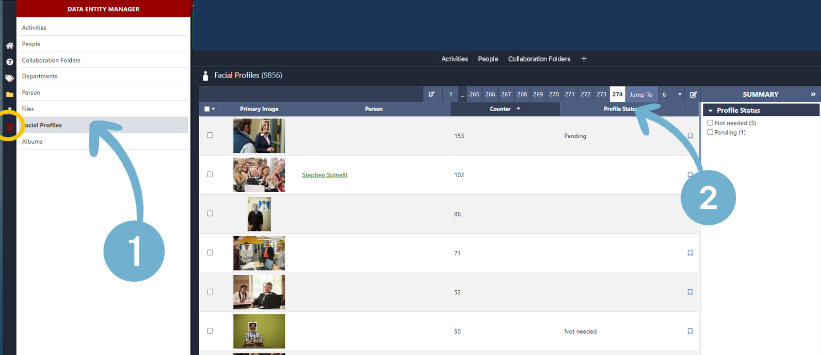
- Go to left-hand toolbar and click on the 3 red bar icon. Click on Facial Profiles. These are all the faces that AI has found.
- The profile status can be useful and tag profiles in pending, not needed etc. We recommend identifying your top 10 facial profiles.
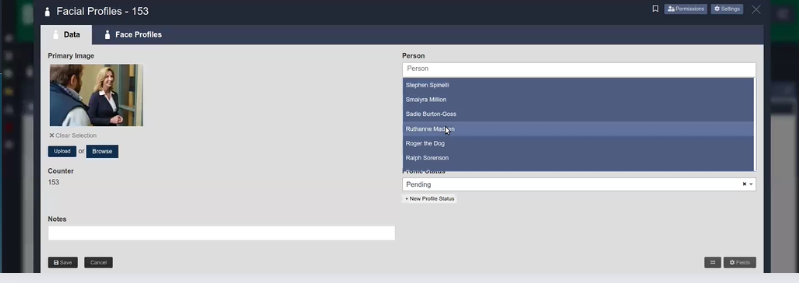
- To identify a person, click on their photo. Go to the data tab and click Edit. Select their correct name and hit the save button! You can also clear the profile status if needed.
- TIP: Sort the counter downwards and start tagging the people with the most featured faces.
To identify a person, click on their photo. Go to the data tab and click Edit. Select their correct name and hit the save button! You can also clear the profile status if needed. If you don't see their name, you can either create a person there, or create a person manually in the People entity section using the +Create New Button.

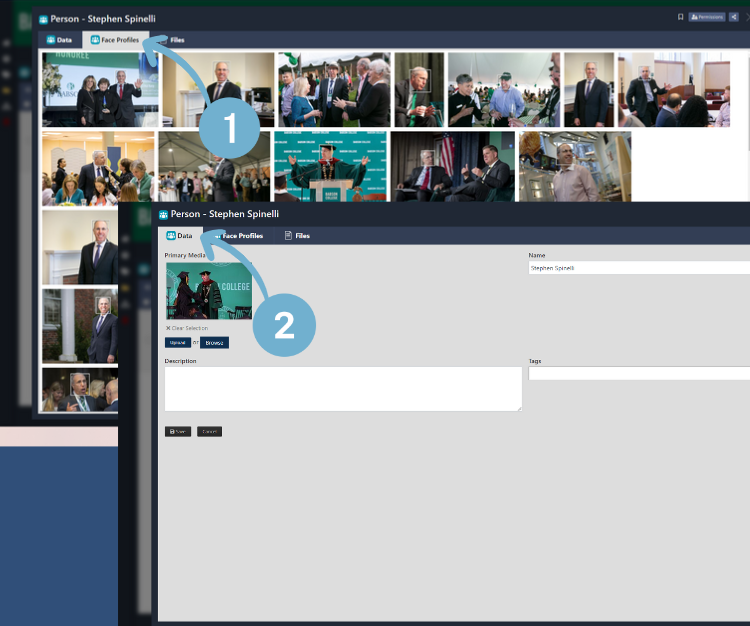
- You will come to the person's profile within the facial profiles section. This is automatically made. This will be periodically be updated which will improve the automatic results.
- In the data tab you can add information such as tags and descriptions.

Once you have uploaded a single or batch of photos or videos, the AI facial recognition will start scanning the new files. You might have to refresh, or wait a while for the facial profiles to appear.
Facial recognition is not an exact science and generally makes broader strokes. So you might expect to find a few different facial profiles for one person. Factors such as plastic surgery, airbrushing, poor photo or video quality and obscured facial features can interfere with facial recognition. This can produce multiple profiles, or simply read no face. This tool works best with high quality photos.
